Cross-Curricular
Cross-Curricular
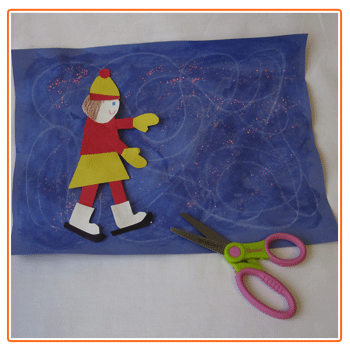
Skate, Glide, Draw!
<div class="default CP-kids-wrapper" id="page-content">
<div class="clearfix"> <!-- Blue Materials Box BEGIN -->
<div id="CP_kidmain-container"> <!-- Final Project Image Begin -->
<div class="cp-subcat-mainimg"><img src="{{media url=westcottbrand/Skate-Glide-Draw!/Wes_skateglidelg.gif}}" usemap="1070" longdesc="Classroom Activities" alt="Skate, Glide, Draw"></div>
<!-- Final Project Image End -->
<p style="margin-bottom:0;"><strong>Use music to inspire students as they create this piece of art! Have a CD player ready to play classical music. </strong></p>
<div class="material-resource">
<div class="material">
<p><strong>Materials:</strong></p>
<ul style="font-size:12px;line-height:20px;">
<li><a target="_blank" href="{{store direct_url="products/scissors/kids-scissors.html"}}">Westcott 5" Kids scissors</a></li>
<li>9" x 12" dark blue construction paper sheet (pond)</li>
<li>construction paper scraps</li>
<li>glitter</li>
<li>paintbrush</li>
<li>glue</li>
<li>crayons, including white</li>
</ul>
</div>
<div class="resource">
<p><strong>Helpful Resources:</strong></p>
<ul style="font-size:12px;line-height:20px;">
<li><a href="{{store direct_url="products/scissors/kids-scissors/scissor-caddy.html"}}" title="Scissor Caddies"><img border="0" alt="Scissor Caddies" src="{{media url=westcottbrand/CAbuttonscissorcaddy.jpg}}" usemap="2071" ></a></li>
<li><a href="{{store direct_url="products/scissors.html"}}" title="Teachers Scissors"><img border="0" alt="Teachers Scissors" src="{{media url=westcottbrand/CAbuttonteacherscissors.jpg}}" usemap="2072"></a></li>
<li><a href="{{store direct_url="products/scissors/kids-scissors.html"}}" title="Kids Scissor Packs"><img border="0" alt="Kids Scissor Packs" src="{{media url=westcottbrand/CAbuttonkidsscissorpack.jpg}}" usemap="2073" ></a></li>
</ul>
</div>
</div>
<p> </p>
<p style="text-align:center;margin-top:5px;float:left;width:100%;clear:both;"><em>Brought to you by Westcott – The World's Favorite Scissors</em></p>
<!-- Free Scissors Banner Begin --> <!-- Free Scissors Banner End --> </div>
<!-- Blue Materials Box END --> <!-- Instructions Row Begin -->
<div style="width: 100%; margin-bottom: 20px; float: left;"> <!-- Step 1 Begin -->
<div class="cp-subleft-section"><img width="300" src="{{media url=westcottbrand/Skate-Glide-Draw!/Wes_skateglide1.gif}}" usemap="1071" longdesc="Classroom Activities" alt="Skate, Glide, Draw Step 1">
<p><strong>Step 1</strong><br>
While the music is playing, push the white crayon along the pond with the rhythm. After the music stops, paint a light coat of glue on the pond and sprinkle on glitter.</p>
</div>
<!-- Step 1 End --> <!-- Step 2 Begin -->
<div class="cp-subright-section"><img width="300" src="{{media url=westcottbrand/Skate-Glide-Draw!/Wes_skateglide2.gif}}" usemap="1072" longdesc="Classroom Activities" alt="Skate, Glide, Draw Step 2">
<p><strong>Step 2</strong><br>
Cut and glue the paper scraps to create an image of you skating. Add crayon details. Glue the skater to the pond.</p>
</div>
<!-- Step 2 End --> </div>
<!-- Instructions Row End --> <!-- Footer Text Begin -->
<div style="text-align: center; width: 100%; margin-bottom: 20px; float: left;">
<p>Adult supervision is recommended when children use scissors.<br>
© 2016 Acme United Corporation. Text and design by The Education Center, Inc.®</p>
</div>
</div>
</div>
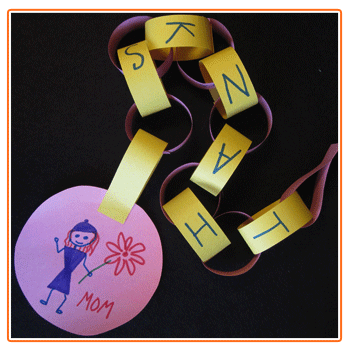
A Chain of Thanks
<div class="default CP-kids-wrapper" id="page-content">
<div class="clearfix"> <!-- Blue Materials Box BEGIN -->
<div id="CP_kidmain-container"> <!-- Final Project Image Begin -->
<div class="cp-subcat-mainimg"><img src="{{media url=westcottbrand/AChain-of-Thanks/Wes_chainofthankslg.gif}}" usemap="784" longdesc="Classroom Activities" alt="A Chain of Thanks Final"></div>
<!-- Final Project Image End -->
<p style="margin-bottom:0;"><strong>Round up thoughts of thankfulness with this fun paper chain.</strong></p>
<div class="material-resource">
<div class="material">
<p><strong>Materials:</strong></p>
<ul style="font-size:12px;line-height:20px;">
<li><a target="_blank" href="{{store direct_url="products/scissors/kids-scissors.html"}}">Westcott 5" Kids scissors</a></li>
<li>two 7" paper squares</li>
<li>5" paper circle</li>
<li>ruler</li>
<li>crayons or markers</li>
<li>glue</li>
</ul>
</div>
<div class="resource">
<p><strong>Helpful Resources:</strong></p>
<ul style="font-size:12px;line-height:20px;">
<li><a href="{{store direct_url="products/scissors/kids-scissors/scissor-caddy.html"}}" title="Scissor Caddies"><img border="0" alt="Scissor Caddies" src="{{media url=westcottbrand/CAbuttonscissorcaddy.jpg}}" usemap="2071" ></a></li>
<li><a href="{{store direct_url="products/scissors.html"}}" title="Teacher's Scissors"><img border="0" alt="Teacher's Scissors" src="{{media url=westcottbrand/CAbuttonteacherscissors.jpg}}" usemap="2072"></a></li>
<li><a href="{{store direct_url="products/scissors/kids-scissors.html"}}" title="Kid's Scissor Packs">
<img border="0" alt="Kid's Scissor Packs" src="{{media url=westcottbrand/CAbuttonkidsscissorpack.jpg}}" usemap="2073" /></a></li>
</ul>
</div>
</div>
<p> </p>
<p style="text-align:center;margin-top:5px;float:left;width:100%;clear:both;"><em>Brought to you by Westcott – The World's Favorite Scissors</em></p>
</div>
<!-- Free Scissors Banner Begin --> <!-- Free Scissors Banner End --> <!-- Blue Materials Box END --> <!-- Instructions Row Begin -->
<div style="width: 100%; margin-bottom: 20px; float: left;"> <!-- Step 1 Begin -->
<div class="cp-subleft-section"><img width="300" src="{{media url=westcottbrand/AChain-of-Thanks/Wes_chainofthanks1.gif}}" usemap="786" longdesc="Classroom Activities" alt="A Chain of Thanks Step 1">
<p><strong>Step 1</strong><br>
Use the ruler to divide each square into 7 one-inch-wide strips. Cut them out. On each of six strips, write a letter in the word THANKS. On each of six more strips, write a thankful thought.</p>
</div>
<!-- Step 1 End --> <!-- Step 2 Begin -->
<div class="cp-subright-section"><img width="300" src="{{media url=westcottbrand/AChain-of-Thanks/Wes_chainofthanks2.gif}}" usemap="790" longdesc="Classroom Activities" alt="A Chain of Thanks Step 2">
<p><strong>Step 2</strong><br>
On the paper circle, draw a picture of something or someone that you are thankful for.</p>
</div>
<!-- Step 2 End --> <!-- Step 3 Begin --> <!-- Step 3 End --> </div>
<!-- Instructions Row End --> <!-- Instructions Row Begin -->
<div style="width: 100%; margin-bottom: 20px; float: left;"> <!-- Step 4 Begin -->
<div class="cp-subleft-section"><img width="300" src="{{media url=westcottbrand/AChain-of-Thanks/Wes_chainofthanks3.gif}}" usemap="796" longdesc="Classroom Activities" alt="A Chain of Thanks Step 3">
<p><strong>Step 3</strong><br>
Form the first loop of the chain by gluing the ends of a blank paper strip. Attach the <em>T</em> strip; then attach one of the loops with a thankful thought. Continue, alternating between the letter and sentence loops, to spell the word THANKS.</p>
</div>
<div class="cp-subright-section"><img width="300" src="{{media url=westcottbrand/AChain-of-Thanks/Wes_chainofthanks4.gif}}" usemap="803" longdesc="Classroom Activities" alt="A Chain of Thanks Step 4">
<p><strong>Step 4</strong><br>
To complete the chain, thread the remaining paper strip through the bottom loop and then glue the circle between the ends of the paper strip.</p>
</div>
<!-- Step 4 End --> </div>
<!-- Instructions Row End --> <!-- Footer Text Begin -->
<div style="text-align: center; width: 100%; margin-bottom: 20px; float: left;">
<p>Adult supervision is recommended when children use scissors.<br>
© 2016 Acme United Corporation. Text and design by The Education Center, Inc.®</p>
</div>
</div>
</div>
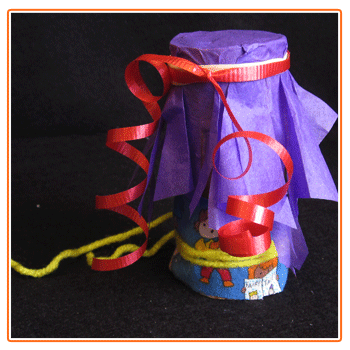
A Musical Interlude
<div class="default CP-kids-wrapper" id="page-content">
<div class="clearfix"> <!-- Blue Materials Box BEGIN -->
<div id="CP_kidmain-container"> <!-- Final Project Image Begin -->
<div class="cp-subcat-mainimg"><img src="{{media url=westcottbrand/A-Musical-Interlude/Wes_musicalinterludelg.gif}}" usemap="913" longdesc="Classroom Activities" alt="Musical Interlude Final"></div>
<!-- Final Project Image End -->
<p style="margin-bottom:0;"><strong>So many skills! Enforce fine-motor development, introduce rhythm, and practice cooperation with these simple and fun instruments. </strong></p>
<div class="material-resource">
<div class="material">
<p><strong>Materials:</strong></p>
<ul style="font-size:12px;line-height:20px;">
<li><a target="_blank" href="{{store direct_url="products/scissors/kids-scissors.html"}}">Westcott 5" Kids scissors</a></li>
<li>cardboard tube</li>
<li>ribbons, yarn, and fabric scraps</li>
<li>rubber band</li>
<li>6" tissue paper square</li>
<li>glue</li>
</ul>
</div>
<div class="resource">
<p><strong>Helpful Resources:</strong></p>
<ul style="font-size:12px;line-height:20px;">
<li><a href="{{store direct_url="products/scissors/kids-scissors/scissor-caddy.html"}}" title="Scissor Caddies"><img border="0" alt="Scissor Caddies" src="{{media url=westcottbrand/CAbuttonscissorcaddy.jpg}}" usemap="2071" ></a></li>
<li><a href="{{store direct_url="products/scissors.html"}}" title="Teacher's Scissors"><img border="0" alt="Teacher's Scissors" src="{{media url=westcottbrand/CAbuttonteacherscissors.jpg}}" usemap="2072"></a></li>
<li><a href="{{store direct_url="products/scissors/kids-scissors.html"}}" title="Kid's Scissor Packs"><img border="0" alt="Kid's Scissor Packs" src="{{media url=westcottbrand/CAbuttonkidsscissorpack.jpg}}" usemap="2073" ></a></li>
</ul>
</div>
</div>
<p> </p>
<p style="text-align:center;margin-top:5px;float:left;width:100%;clear:both;"><em>Brought to you by Westcott – The World's Favorite Scissors</em></p>
<!-- Free Scissors Banner Begin --> <!-- Free Scissors Banner End --> </div>
<!-- Blue Materials Box END --> <!-- Instructions Row Begin -->
<div style="width: 100%; margin-bottom: 20px; float: left;"> <!-- Step 1 Begin -->
<div class="cp-subleft-section"><img width="300" src="{{media url=westcottbrand/A-Musical-Interlude/Wes_musicalinterlude1.gif}}" usemap="914" longdesc="Classroom Activities" alt="Musical Interlude Step 1">
<p><strong>Step 1</strong><br>
Cover one end of your tube with the tissue paper. Use the rubber band to secure it in place.</p>
</div>
<!-- Step 1 End --> <!-- Step 2 Begin -->
<div class="cp-subright-section"><img width="300" src="{{media url=westcottbrand/A-Musical-Interlude/Wes_musicalinterlude2.gif}}" usemap="915" longdesc="Classroom Activities" alt="Musical Interlude Step 2">
<p><strong>Step 2</strong><br>
Using the scissors, fringe-cut the free edges of the tissue paper.</p>
</div>
<!-- Step 2 End --> <!-- Step 3 Begin -->
<div class="cp-subleft-section"><img width="300" src="{{media url=westcottbrand/A-Musical-Interlude/Wes_musicalinterlude3.gif}}" usemap="916" longdesc="Classroom Activities" alt="Musical Interlude Step 3">
<p><strong>Step 3</strong><br>
Cut ribbon, yarn, or fabric scraps and tie or glue each one around the tube to decorate your instrument. Once the tube is complete, hold the open end to your mouth and hum to make beautiful music!</p>
</div>
<!-- Step 3 End --> </div>
<!-- Instructions Row End --> <!-- Instructions Row End --> <!-- Footer Text Begin -->
<div style="text-align: center; width: 100%; margin-bottom: 20px; float: left;">
<p>Adult supervision is recommended when children use scissors.<br>
© 2016 Acme United Corporation. Text and design by The Education Center, Inc.®</p>
</div>
</div>
</div>
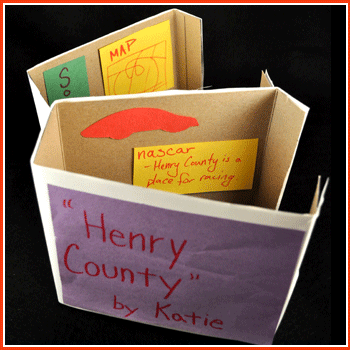
Cereal Box Diorama
<div class="default CP-kids-wrapper" id="page-content">
<div class="clearfix"> <!-- Blue Materials Box BEGIN -->
<div id="CP_kidmain-container"> <!-- Final Project Image Begin -->
<div class="cp-subcat-mainimg"><img src="{{media url=westcottbrand/Cereal-Box-Diorama/Wes_cerealboxlg.gif}}" usemap="1293" longdesc="Classroom Activities" alt="Cereal Box Diorama"></div>
<!-- Final Project Image End -->
<p style="margin-bottom:0;"><strong>A fun activity for any curriculum area! Adapt it to showcase a book report, a science display, social studies research, and more. </strong></p>
<div class="material-resource">
<div class="material">
<p><strong>Materials:</strong></p>
<ul style="font-size:12px;line-height:20px;">
<li><a target="_blank" href="{{store direct_url="products/scissors/kids-scissors.html"}}">Westcott 5" Kids scissors</a></li>
<li>empty cereal box</li>
<li>4 sheets white construction paper</li>
<li>paper scraps</li>
<li>markers </li>
<li>tape</li>
<li>glue</li>
</ul>
</div>
<div class="resource">
<p><strong>Helpful Resources:</strong></p>
<ul style="font-size:12px;line-height:20px;">
<li><a href="{{store direct_url="products/scissors/kids-scissors/scissor-caddy.html"}}" title="Scissor Caddies"><img border="0" alt="Scissor Caddies" src="{{media url=westcottbrand/CAbuttonscissorcaddy.jpg}}" usemap="2071" ></a></li>
<li><a href="{{store direct_url="products/scissors.html"}}" title="Teacher's Scissors"><img border="0" alt="Teacher's Scissors" src="{{media url=westcottbrand/CAbuttonteacherscissors.jpg}}" usemap="2072"></a></li>
<li><a href="{{store direct_url="products/scissors/kids-scissors.html"}}" title="Kid's Scissor Packs"><img border="0" alt="Kid's Scissor Packs" src="{{media url=westcottbrand/CAbuttonkidsscissorpack.jpg}}" usemap="2073" ></a></li>
</ul>
</div>
</div>
<p> </p>
<p style="text-align:center;margin-top:5px;float:left;width:100%;clear:both;"><em>Brought to you by Westcott – The World's Favorite Scissors</em></p>
<!-- Free Scissors Banner Begin --> <!-- Free Scissors Banner End --> </div>
<!-- Blue Materials Box END --> <!-- Instructions Row Begin -->
<div style="width: 100%; margin-bottom: 20px; float: left;"> <!-- Step 1 Begin -->
<div class="cp-subleft-section"><img width="300" src="{{media url=westcottbrand/Cereal-Box-Diorama/Wes_cerealbox1.gif}}" usemap="1294" longdesc="Classroom Activities" alt="Cereal Box Diorama Step 1">
<p><strong>Step 1</strong><br>
Cut off the top and bottom of the box. Vertically cut down the center of the small side of the box. Cut the box in half horizontally and then open the pieces so they lie flat.</p>
</div>
<!-- Step 1 End --> <!-- Step 2 Begin -->
<div class="cp-subright-section"><img width="300" src="{{media url=westcottbrand/Cereal-Box-Diorama/Wes_cerealbox2.gif}}" usemap="1295" longdesc="Classroom Activities" alt="Cereal Box Diorama Step 2">
<p><strong>Step 2</strong><br>
Cover the pieces with white paper. Then stand the boxes side by side and tape them together at the spine to make a jumbo book.</p>
</div>
<!-- Step 2 End --> <!-- Step 3 Begin -->
<div class="cp-subleft-section"><img width="300" src="{{media url=westcottbrand/Cereal-Box-Diorama/Wes_cerealbox3.gif}}" usemap="1296" longdesc="Classroom Activities" alt="Cereal Box Diorama Step 3">
<p><strong>Step 3</strong><br>
Use paper scraps and markers to display information about the project. On the front panel, title the project and add your name.</p>
</div>
<!-- Step 3 End --> </div>
<!-- Instructions Row End --> <!-- Footer Text Begin -->
<div style="text-align: center; width: 100%; margin-bottom: 20px; float: left;">
<p>Adult supervision is recommended when children use scissors.<br>
© 2016 Acme United Corporation. Text and design by The Education Center, Inc.®</p>
</div>
</div>
</div>
Character Mobile
<div class="default CP-kids-wrapper" id="page-content">
<div class="clearfix"> <!-- Blue Materials Box BEGIN -->
<div id="CP_kidmain-container"> <!-- Final Project Image Begin -->
<div class="cp-subcat-mainimg"><img src="{{media url=westcottbrand/All-About-Me-Mobile/Wes_charactermobilelg.gif}}" usemap="997" longdesc="Classroom Activities" alt="Character Mobile"></div>
<!-- Final Project Image End -->
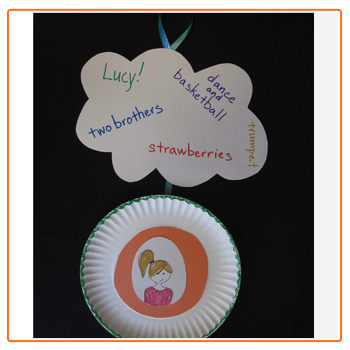
<p style="margin-bottom:0;"><strong>Students get to know one another with this creative back-to-school mobile, which can easily be modified for other classroom activities. To complement a book study, use it to feature a main character; to enhance a social studies unit, use it as part of a biography report!</strong></p>
<div class="material-resource">
<div class="material">
<p><strong>Materials:</strong></p>
<ul style="font-size:12px;line-height:20px;">
<li><a target="_blank" href="{{store direct_url="products/scissors/kids-scissors.html"}}">Westcott 5" Kids scissors</a></li>
<li>9" white paper plate</li>
<li>5 1/2" colorful construction paper square</li>
<li>4" white construction paper square</li>
<li>9" x 12" white construction paper sheet</li>
<li>ribbon</li>
<li>markers (or crayons)</li>
<li>tape</li>
<li>glue</li>
</ul>
</div>
<div class="resource">
<p><strong>Helpful Resources:</strong></p>
<ul style="font-size:12px;line-height:20px;">
<li><a href="{{store direct_url="products/scissors/kids-scissors/scissor-caddy.html"}}" title="Scissor Caddies"><img border="0" alt="Scissor Caddies" src="{{media url=westcottbrand/CAbuttonscissorcaddy.jpg}}" usemap="2071" ></a></li>
<li><a href="{{store direct_url="products/scissors.html"}}" title="Teachers Scissors"><img border="0" alt="Teachers Scissors" src="{{media url=westcottbrand/CAbuttonteacherscissors.jpg}}" usemap="2072"></a></li>
<li><a href="{{store direct_url="products/scissors/kids-scissors.html"}}" title="Kids Scissor Packs"><img border="0" alt="Kids Scissor Packs" src="{{media url=westcottbrand/CAbuttonkidsscissorpack.jpg}}" usemap="2073" ></a></li>
</ul>
</div>
</div>
<p> </p>
<p style="text-align:center;margin-top:5px;float:left;width:100%;clear:both;"><em>Brought to you by Westcott – The World's Favorite Scissors</em></p>
<!-- Free Scissors Banner Begin --> <!-- Free Scissors Banner End --> </div>
<!-- Blue Materials Box END --> <!-- Instructions Row Begin -->
<div style="width: 100%; margin-bottom: 20px; float: left;"> <!-- Step 1 Begin -->
<div class="cp-subleft-section"><img width="300" src="{{media url=westcottbrand/All-About-Me-Mobile/Wes_charactermobile1.gif}}" usemap="998" longdesc="Classroom Activities" alt="Character Mobile Step 1">
<p><strong>Step 1</strong><br>
Trim the construction paper to make a circle that fits in the center of the plate. Glue it in place. Use a marker to outline the rim of the plate.</p>
</div>
<!-- Step 1 End --> <!-- Step 2 Begin -->
<div class="cp-subright-section"><img width="300" src="{{media url=westcottbrand/All-About-Me-Mobile/Wes_charactermobile2.gif}}" usemap="999" longdesc="Classroom Activities" alt="Character Mobile Step 2">
<p><strong>Step 2</strong><br>
Cut the white square to form an oval. Draw a self-portrait. Glue it to the center of the circle on the plate.</p>
</div>
<!-- Step 2 End --> <!-- Step 3 Begin --> <!-- Step 3 End --> </div>
<!-- Instructions Row End --> <!-- Instructions Row Begin --> <!-- Instructions Row Begin -->
<div style="width: 100%; margin-bottom: 20px; float: left;"> <!-- Step 4 Begin -->
<div class="cp-subleft-section"><img width="300" src="{{media url=westcottbrand/All-About-Me-Mobile/Wes_charactermobile3.gif}}" usemap="1000" longdesc="Classroom Activities" alt="Character Mobile Step 3">
<p><strong>Step 3</strong><br>
Cut a large cloud shape from the white construction paper. Write your name and facts about yourself—such as how many members are in your family and what your favorite activities are—on the cloud.</p>
</div>
<div class="cp-subright-section"> <img width="300" src="{{media url=westcottbrand/All-About-Me-Mobile/Wes_charactermobile4.gif}}" usemap="1001" longdesc="Classroom Activities" alt="Character Mobile Step 4">
<p><strong>Step 4</strong><br>
Tape a loop of ribbon to the top of the back of the cloud to make a hanger. Then tape another piece of ribbon to the back of the bottom of the cloud and the top of the plate.</p>
<!-- Step 4 End --> </div>
<!-- Instructions Row End --> <!-- Footer Text Begin -->
<div style="text-align: center; width: 100%; margin-bottom: 20px; float: left;">
<p>Adult supervision is recommended when children use scissors.<br>
© 2016 Acme United Corporation. Text and design by The Education Center, Inc.®</p>
</div>
</div>
</div>
</div>
Cheery Suncatcher
<div class="default CP-kids-wrapper" id="page-content">
<div class="clearfix"> <!-- Blue Materials Box BEGIN -->
<div id="CP_kidmain-container"> <!-- Final Project Image Begin -->
<div class="cp-subcat-mainimg"><img src="{{media url=westcottbrand/Cheery-Suncatcher/Wes_cheerysuncatcherlg.gif}}" usemap="1057" longdesc="Classroom Activities" alt="Cheery Suncatcher"></div>
<!-- Final Project Image End -->
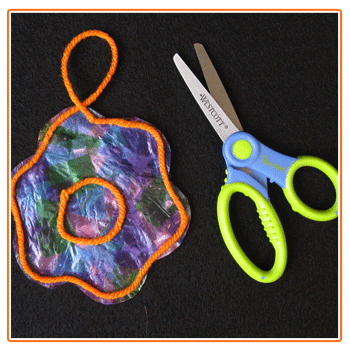
<p style="margin-bottom:0;"><strong>This colorful suncatcher inspires creativity! It can be cut into a geometric shape, letter or number shapes, or a shape to reflect a class theme.</strong></p>
<div class="material-resource">
<div class="material">
<p><strong>Materials:</strong></p>
<ul style="font-size:12px;line-height:20px;">
<li><a target="_blank" href="{{store direct_url="products/scissors/kids-scissors.html"}}">Westcott 5" Kids scissors</a></li>
<li>tissue paper in assorted colors</li>
<li>plastic wrap</li>
<li>small piece of cardboard</li>
<li>yarn</li>
<li>paintbrush</li>
<li>white glue</li>
<li>tape</li>
</ul>
</div>
<div class="resource">
<p><strong>Helpful Resources:</strong></p>
<ul style="font-size:12px;line-height:20px;">
<li><a href="{{store direct_url="products/scissors/kids-scissors/scissor-caddy.html"}}" title="Scissor Caddies"><img border="0" alt="Scissor Caddies" src="{{media url=westcottbrand/CAbuttonscissorcaddy.jpg}}" usemap="2071" ></a></li>
<li><a href="{{store direct_url="products/scissors.html"}}" title="Teachers Scissors"><img border="0" alt="Teachers Scissors" src="{{media url=westcottbrand/CAbuttonteacherscissors.jpg}}" usemap="2072"></a></li>
<li><a href="{{store direct_url="products/scissors/kids-scissors.html"}}" title="Kids Scissor Packs"><img border="0" alt="Kids Scissor Packs" src="{{media url=westcottbrand/CAbuttonkidsscissorpack.jpg}}" usemap="2073" ></a></li>
</ul>
</div>
</div>
<p> </p>
<p style="text-align:center;margin-top:5px;float:left;width:100%;clear:both;"><em>Brought to you by Westcott – The World's Favorite Scissors</em></p>
<!-- Free Scissors Banner Begin --> <!-- Free Scissors Banner End --> </div>
<!-- Blue Materials Box END --> <!-- Instructions Row Begin -->
<div style="width: 100%; margin-bottom: 20px; float: left;"> <!-- Step 1 Begin -->
<div class="cp-subleft-section"><img width="300" src="{{media url=westcottbrand/Cheery-Suncatcher/Wes_cheerysuncatcher1.gif}}" usemap="1058" longdesc="Classroom Activities" alt="Cheery Suncatcher Step 1">
<p><strong>Step 1</strong><br>
Cut the tissue paper into small pieces.</p>
</div>
<!-- Step 1 End --> <!-- Step 2 Begin -->
<div class="cp-subright-section"><img src="{{media url=westcottbrand/Cheery-Suncatcher/Wes_cheerysuncatcher2.gif}}" usemap="1059" longdesc="Classroom Activities" alt="Cheery Suncatcher Step 2">
<p><strong>Step 2</strong><br>
Tape a piece of plastic wrap to the cardboard.</p>
</div>
</div>
<!-- Step 2 End --> <!-- Step 3 Begin -->
<div style="width: 100%; margin-bottom: 20px; float: left;">
<div class="cp-subleft-section"><img src="{{media url=westcottbrand/Cheery-Suncatcher/Wes_cheerysuncatcher3.gif}}" usemap="1060" longdesc="Classroom Activities" alt="Cheery Suncatcher Step 3">
<p><strong>Step 3</strong><br>
Paint an area of the plastic wrap with glue. Lay the pieces of tissue paper on the glue, overlapping them. Carefully paint over the pieces with more glue. Allow the creation to dry overnight.</p>
</div>
<!-- Step 3 End --> <!-- Instructions Row End --> <!-- Instructions Row Begin --> <!-- Step 4 Begin -->
<div class="cp-subright-section"><img src="{{media url=westcottbrand/Cheery-Suncatcher/Wes_cheerysuncatcher4.gif}}" usemap="1061" longdesc="Classroom Activities" alt="Cheery Suncatcher Step 4">
<p><strong>Step 4</strong><br>
Peel the tissue paper away from the plastic wrap and cut it into a shape.</p>
</div>
</div>
<!-- Step 4 End --> <!-- Step 5 Begin -->
<div style="width: 100%; margin-bottom: 20px; float: left;">
<div class="cp-subleft-section"><img src="{{media url=westcottbrand/Cheery-Suncatcher/Wes_cheerysuncatcher5.gif}}" usemap="1088" longdesc="Classroom Activities" alt="Cheery Suncatcher Step 5">
<p><strong>Step 5</strong><br>
Glue a yarn border around the shape's edge, forming a loop in the border for hanging.</p>
</div>
</div>
<!-- Step 5 End --> </div>
<!-- Instructions Row End --> <!-- Footer Text Begin -->
<div style="text-align: center; width: 100%; margin-bottom: 20px; float: left;">
<p>Adult supervision is recommended when children use scissors.<br>
© 2016 Acme United Corporation. Text and design by The Education Center, Inc.®</p>
</div>
</div>
</div>
Dreams for the World
<div id="page-content" class="default CP-kids-wrapper">
<div class="clearfix"><!-- Blue Materials Box BEGIN -->
<div id="CP_kidmain-container"><!-- Final Project Image Begin -->
<div class="cp-subcat-mainimg"><img alt="Dreams for the World Final" src="{{media url=westcottbrand/dreams-for-the-world/Dreams_for_the_World_Final.gif}}" usemap="764" /></div>
<!-- Final Project Image End -->
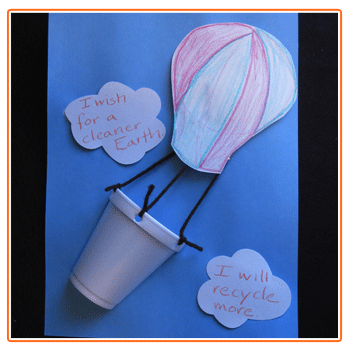
<p style="margin-bottom: 0;"><strong>This colorful critical-thinking project reminds youngsters to help others and believe in themselves. </strong></p>
<div class="material-resource">
<div class="material">
<p><strong>Materials:</strong></p>
<ul style="font-size: 12px; line-height: 20px;">
<li><a target="_blank" href="{{store direct_url="products/scissors/kids-scissors/specialty-scissors.html"}}">Westcott Kids 5" Ergo Jr. Scissors</a></li>
<li><a target="_blank" href="{{store direct_url="products/glue-guns.html"}}">Westcott glue gun</a></li>
<li>9" paper plate</li>
<li>light-blue construction paper</li>
<li>white paper scraps</li>
<li>markers or crayons</li>
<li>foam cup</li>
<li>hole puncher</li>
<li>yarn or ribbon</li>
</ul>
</div>
<div class="resource">
<p><strong>Helpful Resources:</strong></p>
<ul style="font-size: 12px; line-height: 20px;">
<li><a title="Scissor Caddies" href="{{store direct_url="products/scissors/kids-scissors/scissor-caddy.html"}}"><img alt="Scissor Caddies" src="{{media url=westcottbrand/CAbuttonscissorcaddy.jpg}}" usemap="2071" /></a></li>
<li><a title="Teachers Scissors" href="{{store direct_url="products/scissors.html"}}"><img alt="Teachers Scissors" src="{{media url=westcottbrand/CAbuttonteacherscissors.jpg}}" usemap="2072" /></a></li>
<li><a title="Kids Scissor Packs" href="{{store direct_url="products/scissors/kids-scissors.html"}}"><img alt="Kids Scissor Packs" src="{{media url=westcottbrand/CAbuttonkidsscissorpack.jpg}}" usemap="2073" /></a></li>
</ul>
</div>
</div>
<p> </p>
<p style="text-align: center; margin-top: 5px; float: left; width: 100%; clear: both;"><em>Brought to you by Westcott – The World’s Favorite Scissors</em></p>
<!-- Free Scissors Banner Begin --> <!-- Free Scissors Banner End --></div>
<!-- Blue Materials Box END --> <!-- Instructions Row Begin -->
<div style="width: 100%; margin-bottom: 20px; float: left;"><!-- Step 1 Begin -->
<div class="cp-subleft-section"><img alt="Dreams for the World Step 1" src="{{media url=westcottbrand/dreams-for-the-world/Dreams_for_the_World_Step_1.png}}" width="300" usemap="767" />
<p><strong>Step 1</strong><br /> Draw and decorate a hot-air balloon shape on the paper plate. Cut out the drawing.</p>
</div>
<!-- Step 1 End --> <!-- Step 2 Begin -->
<div class="cp-subright-section"><img alt="Dreams for the World Step 2" src="{{media url=westcottbrand/dreams-for-the-world/Dreams_for_the_World_Step_2.png}}" width="300" usemap="771" />
<p><strong>Step 2</strong><br /> Carefully cut the foam cup in half. Punch three holes along the top of the cup. Then cut three pieces of yarn and tie each to a separate hole.</p>
</div>
<!-- Step 2 End --> <!-- Step 3 Begin --> <!-- Step 3 End --></div>
<!-- Instructions Row End --> <!-- Instructions Row Begin -->
<div style="width: 100%; margin-bottom: 20px; float: left;"><!-- Step 4 Begin -->
<div class="cp-subleft-section"><img alt="Dreams for the World Step 3" src="{{media url=westcottbrand/dreams-for-the-world/Dreams_for_the_World_Step_3.png}}" width="300" usemap="775" />
<p><strong>Step 3</strong><br /> Using the white paper scraps, cut out two cloud shapes. Write your wish for the world on one cloud. Then write how you can help make your wish come true on the second cloud.</p>
</div>
<div class="cp-subright-section"><img alt="Dreams for the World Step 4" src="{{media url=wysiwyg/Wes_dreamsforworld4.gif}}" width="300" usemap="779" />
<p><strong>Step 4</strong><br /> Glue the cup to the light-blue paper. Then glue the yarn in place and glue the hot-air balloon over the ends of the yarn. Finally, glue the clouds to the paper.</p>
</div>
<!-- Step 4 End --></div>
<!-- Instructions Row End --> <!-- Footer Text Begin -->
<div style="text-align: center; width: 100%; margin-bottom: 20px; float: left;">
<p>Adult supervision is recommended when children use scissors.<br>
© 2016 Acme United Corporation. Text and design by The Education Center, Inc.®</p>
</div>
</div>
</div>
Giant Dandelions
<div class="default CP-kids-wrapper" id="page-content">
<h1>Classroom Activities—Giant Dandelions</h1>
<div class="clearfix"> <!-- Blue Materials Box BEGIN -->
<div id="CP_kidmain-container"> <!-- Final Project Image Begin -->
<div class="cp-subcat-mainimg"><img src="{{media url=westcottbrand/Dreams-for-theWorld/Wes_giantdandelionlg.gif}}" usemap="983" longdesc="Classroom Activities" alt="Giant Dandelions"></div>
<!-- Final Project Image End -->
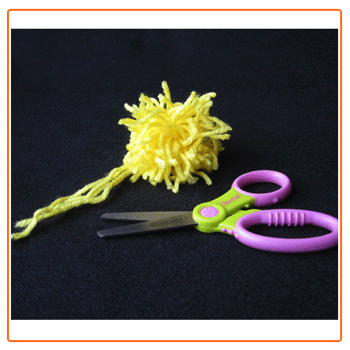
<p style="margin-bottom:0;"><strong>Use these dandelions to draw attention to student work on a motivational display. Want to add some puffballs? Use white instead of yellow yarn!</strong></p>
<div class="material-resource">
<div class="material">
<p><strong>Materials:</strong></p>
<ul style="font-size:12px;line-height:20px;">
<li><a target="_blank" href="{{store direct_url="products/scissors/kids-scissors.html"}}">Westcott 5" Kids scissors</a></li>
<li>3" cardboard square</li>
<li>6 1/2 yards of yellow yarn</li>
<li>three 6" yellow yarn lengths</li>
</ul>
</div>
<div class="resource">
<p><strong>Helpful Resources:</strong></p>
<ul style="font-size:12px;line-height:20px;">
<li><a href="{{store direct_url="products/scissors/kids-scissors/scissor-caddy.html"}}" title="Scissor Caddies"><img border="0" alt="Scissor Caddies" src="{{media url=westcottbrand/CAbuttonscissorcaddy.jpg}}" usemap="2071" ></a></li>
<li><a href="{{store direct_url="products/scissors.html"}}" title="Teachers Scissors"><img border="0" alt="Teachers Scissors" src="{{media url=westcottbrand/CAbuttonteacherscissors.jpg}}" usemap="2072"></a></li>
<li><a href="{{store direct_url="products/scissors/kids-scissors.html"}}" title="Kids Scissor Packs"><img border="0" alt="Kids Scissor Packs" src="{{media url=westcottbrand/CAbuttonkidsscissorpack.jpg}}" usemap="2073" ></a></li>
</ul>
</div>
</div>
<p> </p>
<p style="text-align:center;margin-top:5px;float:left;width:100%;clear:both;"><em>Brought to you by Westcott – The World's Favorite Scissors</em></p>
<!-- Free Scissors Banner Begin --> <!-- Free Scissors Banner End --> </div>
<!-- Blue Materials Box END --> <!-- Instructions Row Begin -->
<div style="width: 100%; margin-bottom: 20px; float: left;"> <!-- Step 1 Begin -->
<div class="cp-subleft-section"><img width="300" src="{{media url=westcottbrand/Dreams-for-theWorld/Wes_giantdandelion1.gif}}" usemap="985" longdesc="Classroom Activities" alt="Giant Dandelions Step 1">
<p><strong>Step 1</strong><br>
Wrap the long section of yarn around the square.</p>
</div>
<!-- Step 1 End --> <!-- Step 2 Begin -->
<div class="cp-subright-section"><img width="300" src="{{media url=westcottbrand/Dreams-for-theWorld/Wes_giantdandelion2.gif}}" usemap="986" longdesc="Classroom Activities" alt="Giant Dandelions Step 2">
<p><strong>Step 2</strong><br>
Use two pieces of yarn to tie the loops tightly at the top and bottom.</p>
</div>
<!-- Step 2 End --> <!-- Step 3 Begin --> <!-- Step 3 End --> </div>
<!-- Instructions Row End --> <!-- Instructions Row Begin -->
<div style="width: 100%; margin-bottom: 20px; float: left;"> <!-- Step 4 Begin -->
<div class="cp-subleft-section"><img width="300" src="{{media url=westcottbrand/Dreams-for-theWorld/Wes_giantdandelion3.gif}}" usemap="987" longdesc="Classroom Activities" alt="Giant Dandelions Step 3">
<p><strong>Step 3</strong><br>
Carefully slide the yarn off the cardboard. Pinch the two tied sections together; then tightly tie them in place with the remaining piece of yarn.</p>
</div>
<div class="cp-subright-section"><img width="300" src="{{media url=westcottbrand/Dreams-for-theWorld/Wes_giantdandelion4.gif}}" usemap="988" longdesc="Classroom Activities" alt="Giant Dandelions Step 4">
<p><strong>Step 4</strong><br>
Cut the loops and trim the cut ends to make a fluffy ball.</p>
</div>
<!-- Step 4 End --> </div>
<!-- Instructions Row End --> <!-- Footer Text Begin -->
<div style="text-align: center; width: 100%; margin-bottom: 20px; float: left;">
<p>Adult supervision is recommended when children use scissors.<br>
© 2016 Acme United Corporation. Text and design by The Education Center, Inc.®</p>
</div>
</div>
<!--[if IE 7]> <div class="clear"></div> <![endif]--> </div>
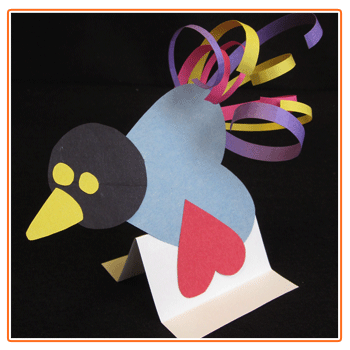
Proud As a Peacock
<div class="default CP-kids-wrapper" id="page-content">
<div class="clearfix"> <!-- Blue Materials Box BEGIN -->
<div id="CP_kidmain-container"> <!-- Final Project Image Begin -->
<div class="cp-subcat-mainimg"><img src="{{media url=westcottbrand/Proud-Asa-peacock/Wes_proudpeacocklg.gif}}" usemap="969" longdesc="Classroom Activities" alt="Proud as a Peacock"></div>
<!-- Final Project Image End -->
<p style="margin-bottom:0;"><strong>This little bird lets students strut their stuff! Place the completed peacocks on a bulletin board to display student's best work or on their desks to recognize excellent behavior!</strong></p>
<div class="material-resource">
<div class="material">
<p><strong>Materials:</strong></p>
<ul style="font-size:12px;line-height:20px;">
<li><a target="_blank" href="{{store direct_url="products/scissors/kids-scissors.html"}}">Westcott 5" Kids scissors</a></li>
<li>3" x 5" index card</li>
<li>4" construction paper square (body)</li>
<li>two 2" construction paper squares (head and wing)</li>
<li>construction paper scraps</li>
<li>glue</li>
</ul>
</div>
<div class="resource">
<p><strong>Helpful Resources:</strong></p>
<ul style="font-size:12px;line-height:20px;">
<li><a href="{{store direct_url="products/scissors/kids-scissors/scissor-caddy.html"}}" title="Scissor Caddies"><img border="0" alt="Scissor Caddies" src="{{media url=westcottbrand/CAbuttonscissorcaddy.jpg}}" usemap="2071" ></a></li>
<li><a href="{{store direct_url="products/scissors.html"}}" title="Teachers Scissors"><img border="0" alt="Teachers Scissors" src="{{media url=westcottbrand/CAbuttonteacherscissors.jpg}}" usemap="2072"></a></li>
<li><a href="{{store direct_url="products/scissors/kids-scissors.html"}}" title="Kids Scissor Packs"><img border="0" alt="Kids Scissor Packs" src="{{media url=westcottbrand/CAbuttonkidsscissorpack.jpg}}" usemap="2073" ></a></li>
</ul>
</div>
</div>
<p> </p>
<p style="text-align:center;margin-top:5px;float:left;width:100%;clear:both;"><em>Brought to you by Westcott – The World's Favorite Scissors</em></p>
<!-- Free Scissors Banner Begin --> <!-- Free Scissors Banner End --> </div>
<!-- Blue Materials Box END --> <!-- Instructions Row Begin -->
<div style="width: 100%; margin-bottom: 20px; float: left;"> <!-- Step 1 Begin -->
<div class="cp-subleft-section"><img width="300" src="{{media url=westcottbrand/Proud-Asa-peacock/Wes_proudpeacock1.gif}}" usemap="970" longdesc="Classroom Activities" alt="Proud as a Peacock Step 1">
<p><strong>Step 1</strong><br>
Fold the index card in half and then along each end to form a base.</p>
</div>
<!-- Step 1 End --> <!-- Step 2 Begin -->
<div class="cp-subright-section"><img width="300" src="{{media url=westcottbrand/Proud-Asa-peacock/Wes_proudpeacock2.gif}}" usemap="971" longdesc="Classroom Activities" alt="Proud as a Peacock Step 2">
<p><strong>Step 2</strong><br>
Trim the body and the wing to make heart shapes. Trim the head to make a circle. Glue the wing and head to the body.</p>
</div>
<!-- Step 2 End --> <!-- Step 3 Begin --> <!-- Step 3 End --> </div>
<!-- Instructions Row End --> <!-- Instructions Row Begin -->
<div style="width: 100%; margin-bottom: 20px; float: left;"> <!-- Step 4 Begin -->
<div class="cp-subleft-section"><img width="300" src="{{media url=westcottbrand/Proud-Asa-peacock/Wes_proudpeacock3.gif}}" usemap="972" longdesc="Classroom Activities" alt="Proud as a Peacock Step 3">
<p><strong>Step 3</strong><br>
Cut strips in various sizes and colors from the construction paper scraps. Roll one end of each strip around a pencil, unroll it, and then glue the uncurled end to the body.</p>
</div>
<div class="cp-subright-section"><img width="300" src="{{media url=westcottbrand/Proud-Asa-peacock/Wes_proudpeacock4.gif}}" usemap="973" longdesc="Classroom Activities" alt="Proud as a Peacock Step 4">
<p><strong>Step 4</strong><br>
Cut eyes and a beak from the paper scraps and glue them to the head. Glue the peacock to the index-card base.</p>
</div>
<!-- Step 4 End --> </div>
<!-- Instructions Row End --> <!-- Footer Text Begin -->
<div style="text-align: center; width: 100%; margin-bottom: 20px; float: left;">
<p>Adult supervision is recommended when children use scissors.<br>
© 2016 Acme United Corporation. Text and design by The Education Center, Inc.®</p>
</div>
</div>
<!--[if IE 7]> <div class="clear"></div> <![endif]--> </div>
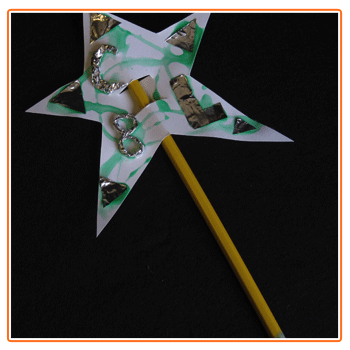
Ready Your Wand!
<div class="default CP-kids-wrapper" id="page-content">
<div class="clearfix"> <!-- Blue Materials Box BEGIN -->
<div id="CP_kidmain-container"> <!-- Final Project Image Begin -->
<div class="cp-subcat-mainimg"><img src="{{media url=westcottbrand/Ready-Your-Wand!/Wes_readyyourwandlg.gif}}" usemap="903" longdesc="Classroom Activities" alt="Ready Your Wand Final"></div>
<!-- Final Project Image End -->
<p style="margin-bottom:0;"><strong>This magical wand is great for practicing letters, shapes, and numbers or for role playing! </strong></p>
<div class="material-resource">
<div class="material">
<p><strong>Materials:</strong></p>
<ul style="font-size:12px;line-height:20px;">
<li><a target="_blank" href="{{store direct_url="products/scissors/kids-scissors.html"}}">Westcott 5" Kids scissors</a></li>
<li>circle or star-shaped tracer</li>
<li>5" tagboard square</li>
<li>unsharpened pencil</li>
<li>tinted liquid glue</li>
<li>5" aluminum foil square</li>
<li>tape</li>
</ul>
</div>
<div class="resource">
<p><strong>Helpful Resources:</strong></p>
<ul style="font-size:12px;line-height:20px;">
<li><a href="{{store direct_url="products/scissors/kids-scissors/scissor-caddy.html"}}" title="Scissor Caddies"><img border="0" alt="Scissor Caddies" src="{{media url=westcottbrand/CAbuttonscissorcaddy.jpg}}" usemap="2071" ></a></li>
<li><a href="{{store direct_url="products/scissors.html"}}" title="Teachers Scissors"><img border="0" alt="Teachers Scissors" src="{{media url=westcottbrand/CAbuttonteacherscissors.jpg}}" usemap="2072"></a></li>
<li><a href="{{store direct_url="products/scissors/kids-scissors.html"}}" title="Kids Scissor Packs"><img border="0" alt="Kids Scissor Packs" src="{{media url=westcottbrand/CAbuttonkidsscissorpack.jpg}}" usemap="2073" ></a></li>
</ul>
</div>
</div>
<p> </p>
<p style="text-align:center;margin-top:5px;float:left;width:100%;clear:both;"><em>Brought to you by Westcott – The World's Favorite Scissors</em></p>
<!-- Free Scissors Banner Begin --> <!-- Free Scissors Banner End --> </div>
<!-- Blue Materials Box END --> <!-- Instructions Row Begin -->
<div style="width: 100%; margin-bottom: 20px; float: left;"> <!-- Step 1 Begin -->
<div class="cp-subleft-section"><img width="300" src="{{media url=westcottbrand/Ready-Your-Wand!/Wes_readyyourwand1.gif}}" usemap="904" longdesc="Classroom Activities" title="Ready Your Wand Step 1">
<p><strong>Step 1</strong><br>
Trace the circle or star shape on the tagboard. Cut it out.</p>
</div>
<!-- Step 1 End --> <!-- Step 2 Begin -->
<div class="cp-subright-section"><img width="300" src="{{media url=westcottbrand/Ready-Your-Wand!/Wes_readyyourwand2.gif}}" usemap="905" longdesc="Classroom Activities" alt="Ready Your Wand Step 2">
<p><strong>Step 2</strong><br>
Ask your teacher to help you cut two parallel slits in the shape. Insert the pencil through the slits to create the wand. Tape the pencil in place on the back of the wand.</p>
</div>
<!-- Step 2 End --> <!-- Step 3 Begin --> <!-- Step 3 End --> </div>
<!-- Instructions Row End --> <!-- Instructions Row Begin -->
<div style="width: 100%; margin-bottom: 20px; float: left;"> <!-- Step 4 Begin -->
<div class="cp-subleft-section"><img width="300" src="{{media url=westcottbrand/Ready-Your-Wand!/Wes_readyyourwand3.gif}}" usemap="906" longdesc="Classroom Activities" alt="Ready Your Wand Step 3">
<p><strong>Step 3</strong><br>
Twist or cut the foil into smaller pieces, forming specific shapes, letters, or numbers.</p>
</div>
<div class="cp-subright-section"><img width="300" src="{{media url=westcottbrand/Ready-Your-Wand!/Wes_readyyourwand4.gif}}" usemap="907" longdesc="Classroom Activities" alt="Ready Your Wand Step 4">
<p><strong>Step 4</strong><br>
Drizzle tinted glue over the tagboard wand head and press the foil pieces into the glue.</p>
</div>
<!-- Step 4 End --> </div>
<!-- Instructions Row End --> <!-- Footer Text Begin -->
<div style="text-align: center; width: 100%; margin-bottom: 20px; float: left;">
<p>Adult supervision is recommended when children use scissors.<br>
© 2016 Acme United Corporation. Text and design by The Education Center, Inc.®</p>
</div>
</div>
</div>
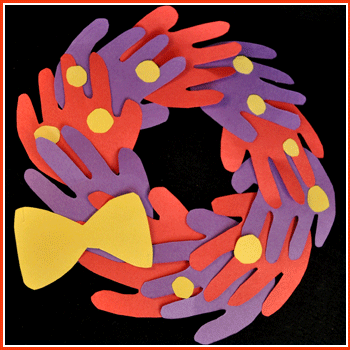
All Hands Together
<div class="default CP-kids-wrapper" id="page-content">
<div class="clearfix"> <!-- Blue Materials Box BEGIN -->
<div id="CP_kidmain-container"> <!-- Final Project Image Begin -->
<div class="cp-subcat-mainimg"><img src="{{media url=westcottbrand/All-Hands-Together/Wes_allhandslg.gif}}" usemap="1338" longdesc="Classroom Activities" alt="All Hands Together Large"></div>
<!-- Final Project Image End -->
<p style="margin-bottom:0;"><strong>These "hand-some" wreaths provide colorful, fun patterning practice. </strong></p>
<div class="material-resource">
<div class="material">
<p><strong>Materials:</strong></p>
<ul style="font-size:12px;line-height:20px;">
<li><a target="_blank" href="{{store direct_url="products/scissors/kids-scissors.html"}}">Westcott 5" Kids scissors</a></li>
<li>2 colors of construction paper</li>
<li>paper scraps</li>
<li>pencil</li>
<li>glue</li>
</ul>
</div>
<div class="resource">
<p><strong>Helpful Resources:</strong></p>
<ul style="font-size:12px;line-height:20px;">
<li><a href="{{store direct_url="products/scissors/kids-scissors/scissor-caddy.html"}}" title="Scissor Caddies"><img border="0" alt="Scissor Caddies" src="{{media url=westcottbrand/CAbuttonscissorcaddy.jpg}}" usemap="2071" ></a></li>
<li><a href="{{store direct_url="products/scissors.html"}}" title="Teachers Scissors"><img border="0" alt="Teachers Scissors" src="{{media url=westcottbrand/CAbuttonteacherscissors.jpg}}" usemap="2072"></a></li>
<li><a href="{{store direct_url="products/scissors/kids-scissors.html"}}" title="Kids Scissor Packs"><img border="0" alt="Kids Scissor Packs" src="{{media url=westcottbrand/CAbuttonkidsscissorpack.jpg}}" usemap="2073" ></a></li>
</ul>
</div>
</div>
<p> </p>
<p style="text-align:center;margin-top:5px;float:left;width:100%;clear:both;"><em>Brought to you by Westcott – The World's Favorite Scissors</em></p>
<!-- Free Scissors Banner Begin --> <!-- Free Scissors Banner End --> </div>
<!-- Blue Materials Box END --> <!-- Instructions Row Begin -->
<div style="width: 100%; margin-bottom: 20px; float: left;"> <!-- Step 1 Begin -->
<div class="cp-subleft-section"><img width="300" src="{{media url=westcottbrand/All-Hands-Together/Wes_allhands1.gif}}" usemap="1339" longdesc="Classroom Activities" alt="All Hands Together Step 1">
<p><strong>Step 1</strong><br>
Trace your hands on the paper and cut them out so you have ten hand cutouts (five in each color).</p>
</div>
<!-- Step 1 End --> <!-- Step 2 Begin -->
<div class="cp-subright-section"><img width="300" src="{{media url=westcottbrand/All-Hands-Together/Wes_allhands2.gif}}" usemap="1340" longdesc="Classroom Activities" alt="All Hands Together Step 2">
<p><strong>Step 2</strong><br>
Arrange them in a circle using a color pattern. Then glue the pieces together.</p>
</div>
<!-- Step 2 End --> <!-- Step 3 Begin -->
<div class="cp-subleft-section"><img width="300" src="{{media url=westcottbrand/All-Hands-Together/Wes_allhands3.gif}}" longdesc="Classroom Activities" alt="Cereal Box Diorama Step 3">
<p><strong>Step 3</strong><br>
Cut other details from the paper scraps and use them to embellish the wreath.</p>
</div>
<!-- Step 3 End --> </div>
<!-- Instructions Row End --> <!-- Footer Text Begin -->
<div style="text-align: center; width: 100%; margin-bottom: 20px; float: left;">
<p>Adult supervision is recommended when children use scissors.<br>
© 2016 Acme United Corporation. Text and design by The Education Center, Inc.®</p>
</div>
</div>
<!--[if IE 7]> <div class="clear"></div> <![endif]--> </div>
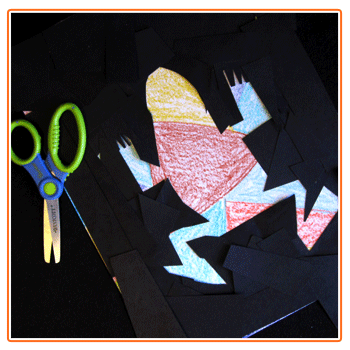
Colors That Pop
<div class="default CP-kids-wrapper" id="page-content">
<div class="clearfix"> <!-- Blue Materials Box BEGIN -->
<div id="CP_kidmain-container"> <!-- Final Project Image Begin -->
<div class="cp-subcat-mainimg"><img src="{{media url=westcottbrand/Colors-That-Pop/Wes_colorsthatpoplg.gif}}" usemap="1093" longdesc="Classroom Activities" alt="Colors That Pop Final"></div>
<!-- Final Project Image End -->
<p style="margin-bottom:0;"><strong>Bright and vivid—this project provides a fun way to explore colors and experiment with positive and negative space. </strong></p>
<div class="material-resource">
<div class="material">
<p><strong>Materials:</strong></p>
<ul style="font-size:12px;line-height:20px;">
<li><a target="_blank" href="{{store direct_url="products/scissors/kids-scissors.html"}}">Westcott 5" Kids scissors</a></li>
<li>crayons or markers</li>
<li>white construction paper</li>
<li>black construction paper</li>
<li>glue</li>
</ul>
</div>
<div class="resource">
<p><strong>Helpful Resources:</strong></p>
<ul style="font-size:12px;line-height:20px;">
<li><a href="{{store direct_url="products/scissors/kids-scissors/scissor-caddy.html"}}" title="Scissor Caddies"><img border="0" alt="Scissor Caddies" src="{{media url=westcottbrand/CAbuttonscissorcaddy.jpg}}" usemap="2071" ></a></li>
<li><a href="{{store direct_url="products/scissors.html"}}" title="Teachers Scissors"><img border="0" alt="Teachers Scissors" src="{{media url=westcottbrand/CAbuttonteacherscissors.jpg}}" usemap="2072"></a></li>
<li><a href="{{store direct_url="products/scissors/kids-scissors.html"}}" title="Kids Scissor Packs"><img border="0" alt="Kids Scissor Packs" src="{{media url=westcottbrand/CAbuttonkidsscissorpack.jpg}}" usemap="2073" ></a></li>
</ul>
</div>
</div>
<p> </p>
<p style="text-align:center;margin-top:5px;float:left;width:100%;clear:both;"><em>Brought to you by Westcott – The World's Favorite Scissors</em></p>
<!-- Free Scissors Banner Begin --> <!-- Free Scissors Banner End --> </div>
<!-- Blue Materials Box END --> <!-- Instructions Row Begin -->
<div style="width: 100%; margin-bottom: 20px; float: left;"> <!-- Step 1 Begin -->
<div class="cp-subleft-section"><img width="300" src="{{media url=westcottbrand/Colors-That-Pop/Wes_colorsthatpop1.gif}}" usemap="932" longdesc="Classroom Activities" alt="Colors That Pop Step 1">
<p><strong>Step 1</strong><br>
Color the white paper, being sure to fill every space. Observe the way different colors stand out next to each other.</p>
</div>
<!-- Step 1 End --> <!-- Step 2 Begin -->
<div class="cp-subright-section"><img width="300" src="{{media url=westcottbrand/Colors-That-Pop/Wes_colorsthatpop2.gif}}" usemap="1092" longdesc="Classroom Activities" alt="Colors That Pop Step 2">
<p><strong>Step 2</strong><br>
Cut the black paper into smaller shapes and strips. Then arrange the pieces on top of the colored paper until the colored paper that shows through creates an image. Carefully glue the black paper in place and trim the edges of the project if needed.</p>
</div>
<!-- Step 2 End --> </div>
<!-- Instructions Row End --> <!-- Footer Text Begin -->
<div style="text-align: center; width: 100%; margin-bottom: 20px; float: left;">
<p>Adult supervision is recommended when children use scissors.<br>
© 2016 Acme United Corporation. Text and design by The Education Center, Inc.®</p>
</div>
</div>
</div>
Personal Puzzle
<div class="default CP-kids-wrapper" id="page-content">
<h1>Classroom Activities—Personal Puzzle</h1>
<div class="clearfix"> <!-- Blue Materials Box BEGIN -->
<div id="CP_kidmain-container"> <!-- Final Project Image Begin -->
<div class="cp-subcat-mainimg"><img src="{{media url=westcottbrand/Personal-Puzzle/Wes_personalpuzzlelg.gif}}" usemap="1368" longdesc="Classroom Activities" alt="Personal Puzzle Large"></div>
<!-- Final Project Image End -->
<p style="margin-bottom:0;"><strong>Youngsters will love making their own artwork into puzzles. Set the finished projects at a center or save them for free time.</strong></p>
<div class="material-resource">
<div class="material">
<p><strong>Materials:</strong></p>
<ul style="font-size:12px;line-height:20px;">
<li><a target="_blank" href="{{store direct_url="products/scissors/kids-scissors.html"}}">Westcott 5" Kids scissors</a></li>
<li>construction paper sheet</li>
<li>markers or crayons</li>
</ul>
</div>
<div class="resource">
<p><strong>Helpful Resources:</strong></p>
<ul style="font-size:12px;line-height:20px;">
<li><a href="{{store direct_url="products/scissors/kids-scissors/scissor-caddy.html"}}" title="Scissor Caddies"><img border="0" alt="Scissor Caddies" src="{{media url=westcottbrand/CAbuttonscissorcaddy.jpg}}" usemap="2071" ></a></li>
<li><a href="{{store direct_url="products/scissors.html"}}" title="Teachers Scissors"><img border="0" alt="Teachers Scissors" src="{{media url=westcottbrand/CAbuttonteacherscissors.jpg}}" usemap="2072"></a></li>
<li><a href="{{store direct_url="products/scissors/kids-scissors.html"}}" title="Kids Scissor Packs"><img border="0" alt="Kids Scissor Packs" src="{{media url=westcottbrand/CAbuttonkidsscissorpack.jpg}}" usemap="2073" ></a></li>
</ul>
</div>
</div>
<p> </p>
<p style="text-align:center;margin-top:5px;float:left;width:100%;clear:both;"><em>Brought to you by Westcott – The World's Favorite Scissors</em></p>
<!-- Free Scissors Banner Begin --> <!-- Free Scissors Banner End --> </div>
<!-- Blue Materials Box END --> <!-- Instructions Row Begin -->
<div style="width: 100%; margin-bottom: 20px; float: left;"> <!-- Step 1 Begin -->
<div class="cp-subleft-section"><img width="300" src="{{media url=westcottbrand/Personal-Puzzle/Wes_personalpuzzle1.gif}}" usemap="1369" longdesc="Classroom Activities" alt="Personal Puzzle Step 1">
<p><strong>Step 1</strong><br>
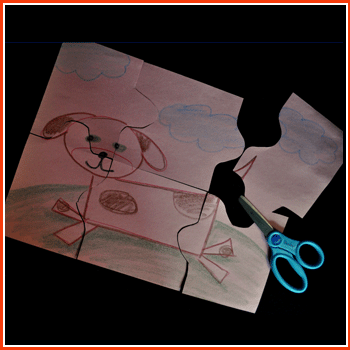
Draw a picture or pattern on the construction paper.</p>
</div>
<!-- Step 1 End --> <!-- Step 2 Begin -->
<div class="cp-subright-section"><img width="300" src="{{media url=westcottbrand/Personal-Puzzle/Wes_personalpuzzle2.gif}}" usemap="1370" longdesc="Classroom Activities" title="Personal Puzzle Step 2">
<p><strong>Step 2</strong><br>
With help as needed, puzzle-cut the picture into six pieces. Then share your puzzle with a friend!</p>
</div>
<!-- Step 2 End --> </div>
<!-- Instructions Row End --> <!-- Footer Text Begin -->
<div style="text-align: center; width: 100%; margin-bottom: 20px; float: left;">
<p>Adult supervision is recommended when children use scissors.<br>
© 2016 Acme United Corporation. Text and design by The Education Center, Inc.®</p>
</div>
</div>
<!--[if IE 7]> <div class="clear"></div> <![endif]--> </div>
Crazy Hair
<div class="default CP-kids-wrapper" id="page-content">
<div class="clearfix"> <!-- Blue Materials Box BEGIN -->
<div id="CP_kidmain-container"> <!-- Final Project Image Begin -->
<div class="cp-subcat-mainimg"><img src="{{media url=westcottbrand/CrazyHair/Wes_crazyhairlg.gif}}" usemap="1371" longdesc="Classroom Activities" alt="Crazy Hair Large"></div>
<!-- Final Project Image End -->
<p style="margin-bottom:0;"><strong>Expand creativity, individuality, and color skills with a display of crazy faces and hairstyles. </strong></p>
<div class="material-resource">
<div class="material">
<p><strong>Materials:</strong></p>
<ul style="font-size:12px;line-height:20px;">
<li><a target="_blank" href="{{store direct_url="products/scissors/kids-scissors.html"}}">Westcott 5" Kids scissors</a></li>
<li>oval construction paper</li>
<li>paper scraps</li>
<li>glue</li>
<li>crayons</li>
</ul>
</div>
<div class="resource">
<p><strong>Helpful Resources:</strong></p>
<ul style="font-size:12px;line-height:20px;">
<li><a href="{{store direct_url="products/scissors/kids-scissors/scissor-caddy.html"}}" title="Scissor Caddies"><img border="0" alt="Scissor Caddies" src="{{media url=westcottbrand/CAbuttonscissorcaddy.jpg}}" usemap="2071" ></a></li>
<li><a href="{{store direct_url="products/scissors.html"}}" title="Teachers Scissors"><img border="0" alt="Teachers Scissors" src="{{media url=westcottbrand/CAbuttonteacherscissors.jpg}}" usemap="2072"></a></li>
<li><a href="{{store direct_url="products/scissors/kids-scissors.html"}}" title="Kids Scissor Packs"><img border="0" alt="Kids Scissor Packs" src="{{media url=westcottbrand/CAbuttonkidsscissorpack.jpg}}" usemap="2073" ></a></li>
</ul>
</div>
</div>
<p> </p>
<p style="text-align:center;margin-top:5px;float:left;width:100%;clear:both;"><em>Brought to you by Westcott – The World's Favorite Scissors</em></p>
<!-- Free Scissors Banner Begin --> <!-- Free Scissors Banner End --> </div>
<!-- Blue Materials Box END --> <!-- Instructions Row Begin -->
<div style="width: 100%; margin-bottom: 20px; float: left;"> <!-- Step 1 Begin -->
<div class="cp-subleft-section"><img width="300" src="{{media url=westcottbrand/CrazyHair/Wes_crazyhair1.gif}}" usemap="1372" longdesc="Classroom Activities" alt="Crazy Hair Step 1">
<p><strong>Step 1</strong><br>
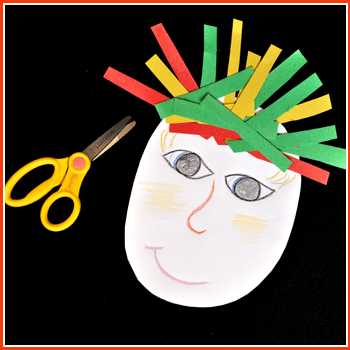
Draw a face on the oval.</p>
</div>
<!-- Step 1 End --> <!-- Step 2 Begin -->
<div class="cp-subright-section"><img width="300" alt="" src="{{media url=westcottbrand/CrazyHair/Wes_crazyhair2.gif}}" usemap="1373" longdesc="Classroom Activities" alt="Crazy Hair Step 2">
<p><strong>Step 2</strong><br>
Cut the paper scraps into strips. Then arrange them, in a color pattern if desired, and glue them to the face to make crazy hair.</p>
</div>
<!-- Step 2 End --> </div>
<!-- Instructions Row End --> <!-- Footer Text Begin -->
<div style="text-align: center; width: 100%; margin-bottom: 20px; float: left;">
<p>Adult supervision is recommended when children use scissors.<br>
© 2016 Acme United Corporation. Text and design by The Education Center, Inc.®</p>
</div>
</div>
<!--[if IE 7]> <div class="clear"></div> <![endif]--> </div>
Smiling Sun
<div class="default CP-kids-wrapper" id="page-content">
<div class="clearfix"> <!-- Blue Materials Box BEGIN -->
<div id="CP_kidmain-container"> <!-- Final Project Image Begin -->
<div class="cp-subcat-mainimg"><img src="{{media url=westcottbrand/Smiling-Sun/Wes_smilingsunlg.gif}}" usemap="1394" longdesc="Classroom Activities" alt="Smiling Sun Large"></div>
<!-- Final Project Image End -->
<p style="margin-bottom:0;"><strong>Sunshine masks are versatile; they're perfect for storytelling, gross-motor play, and even science exploration. </strong></p>
<div class="material-resource">
<div class="material">
<p><strong>Materials:</strong></p>
<ul style="font-size:12px;line-height:20px;">
<li><a target="_blank" href="{{store direct_url="products/scissors/kids-scissors.html"}}">Westcott 5" Kids scissors</a></li>
<li>paper plate with the center cut out</li>
<li>yellow paper scraps</li>
<li>triangle tracer</li>
<li>jumbo craft stick</li>
<li>yellow marker</li>
<li>glue</li>
</ul>
</div>
<div class="resource">
<p><strong>Helpful Resources:</strong></p>
<ul style="font-size:12px;line-height:20px;">
<li><a href="{{store direct_url="products/scissors/kids-scissors/scissor-caddy.html"}}" title="Scissor Caddies"><img border="0" alt="Scissor Caddies" src="{{media url=westcottbrand/CAbuttonscissorcaddy.jpg}}" usemap="2071" ></a></li>
<li><a href="{{store direct_url="products/scissors.html"}}" title="Teachers Scissors"><img border="0" alt="Teachers Scissors" src="{{media url=westcottbrand/CAbuttonteacherscissors.jpg}}" usemap="2072"></a></li>
<li><a href="{{store direct_url="products/scissors/kids-scissors.html"}}" title="Kids Scissor Packs"><img border="0" alt="Kids Scissor Packs" src="{{media url=westcottbrand/CAbuttonkidsscissorpack.jpg}}" usemap="2073" ></a></li>
</ul>
</div>
</div>
<p> </p>
<p style="text-align:center;margin-top:5px;float:left;width:100%;clear:both;"><em>Brought to you by Westcott – The World's Favorite Scissors</em></p>
<!-- Free Scissors Banner Begin --> <!-- Free Scissors Banner End --> </div>
<!-- Blue Materials Box END --> <!-- Instructions Row Begin -->
<div style="width: 100%; margin-bottom: 20px; float: left;"> <!-- Step 1 Begin -->
<div class="cp-subleft-section"><img width="300" src="{{media url=westcottbrand/Smiling-Sun/Wes_smilingsun1.gif}}" usemap="1395" longdesc="Classroom Activities" alt="Smiling Sun Step 1">
<p><strong>Step 1</strong><br>
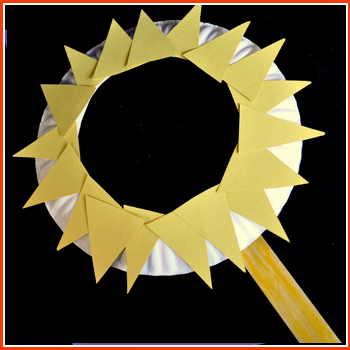
Trace and cut out many yellow triangles.</p>
</div>
<!-- Step 1 End --> <!-- Step 2 Begin -->
<div class="cp-subright-section"><img width="300" src="{{media url=westcottbrand/Smiling-Sun/Wes_smilingsun2.gif}}" usemap="1396" longdesc="Classroom Activities" title="Smiling Sun Step 2">
<p><strong>Step 2</strong><br>
Glue the triangles around the edge of the plate (mask) to make a sun.</p>
</div>
<!-- Step 2 End --> <!-- Step 3 Begin -->
<div class="cp-subleft-section"><img height="197" width="300" alt="" src="{{media url=westcottbrand/Smiling-Sun/Wes_smilingsun3.gif}}" usemap="1397" longdesc="Classroom Activities" title="Smiling Sun Step 3">
<p><strong>Step 3</strong><br>
Color the craft stick yellow and glue it to the back of the mask to make a handle. When the glue is dry, hold the mask up to your face and smile!</p>
</div>
<!-- Step 3 End --> </div>
<!-- Instructions Row End --> <!-- Footer Text Begin -->
<div style="text-align: center; width: 100%; margin-bottom: 20px; float: left;">
<p>Adult supervision is recommended when children use scissors.<br>
© 2016 Acme United Corporation. Text and design by The Education Center, Inc.®</p>
</div>
</div>
<!--[if IE 7]> <div class="clear"></div> <![endif]--> </div>
Special Me Project
<div class="default CP-kids-wrapper" id="page-content">
<h1>Classroom Activities—Special Me</h1>
<div class="clearfix"> <!-- Blue Materials Box BEGIN -->
<div id="CP_kidmain-container"> <!-- Final Project Image Begin -->
<div class="cp-subcat-mainimg"><img src="{{media url=westcottbrand/Special-Me/Wes_specialmelg.gif}}" usemap="1335" longdesc="Classroom Activities" alt="Special Me Large"></div>
<!-- Final Project Image End -->
<p style="margin-bottom:0;"><strong>Isn't it exciting that we're special in different ways? Highlight the strengths in your classroom by having each child complete this confidence-boosting craft. Display the completed projects side-by-side to make a class quilt. </strong></p>
<div class="material-resource">
<div class="material">
<p><strong>Materials:</strong></p>
<ul style="font-size:12px;line-height:20px;">
<li><a target="_blank" href="{{store direct_url="products/scissors/kids-scissors.html"}}">Westcott 5" Kids scissors</a></li>
<li>8" paper square</li>
<li>white paper</li>
<li>glue</li>
<li>markers</li>
</ul>
</div>
<div class="resource">
<p><strong>Helpful Resources:</strong></p>
<ul style="font-size:12px;line-height:20px;">
<li><a href="{{store direct_url="products/scissors/kids-scissors/scissor-caddy.html"}}" title="Scissor Caddies"><img border="0" alt="Scissor Caddies" src="{{media url=westcottbrand/CAbuttonscissorcaddy.jpg}}" usemap="2071" ></a></li>
<li><a href="{{store direct_url="products/scissors.html"}}" title="Teachers Scissors"><img border="0" alt="Teachers Scissors" src="{{media url=westcottbrand/CAbuttonteacherscissors.jpg}}" usemap="2072"></a></li>
<li><a href="{{store direct_url="products/scissors/kids-scissors.html"}}" title="Kids Scissor Packs"><img border="0" alt="Kids Scissor Packs" src="{{media url=westcottbrand/CAbuttonkidsscissorpack.jpg}}" usemap="2073" ></a></li>
</ul>
</div>
</div>
<p> </p>
<p style="text-align:center;margin-top:5px;float:left;width:100%;clear:both;"><em>Brought to you by Westcott – The World's Favorite Scissors</em></p>
<!-- Free Scissors Banner Begin --> <!-- Free Scissors Banner End --> </div>
<!-- Blue Materials Box END --> <!-- Instructions Row Begin -->
<div style="width: 100%; margin-bottom: 20px; float: left;"> <!-- Step 1 Begin -->
<div class="cp-subleft-section"><img width="300" src="{{media url=westcottbrand/Special-Me/Wes_specialme1.gif}}" usemap="1336" longdesc="Classroom Activities" alt="Special Me Step 1">
<p><strong>Step 1</strong><br>
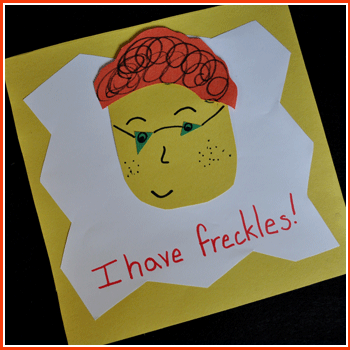
Trim the white paper into a shape that fits onto the paper square. Then glue that shape in place.</p>
</div>
<!-- Step 1 End --> <!-- Step 2 Begin -->
<div class="cp-subright-section"><img width="300" src="{{media url=westcottbrand/Special-Me/Wes_specialme2.gif}}" usemap="1337" longdesc="Classroom Activities" alt="Special Me Step 2">
<p><strong>Step 2</strong><br>
Near the bottom of the shape, write a sentence about something that makes you unique. Use markers and paper scraps to illustrate the sentence. Draw stitch marks along the outside edge of the project to make it look like a quilt square.</p>
</div>
<!-- Step 2 End --> </div>
<!-- Instructions Row End --> <!-- Footer Text Begin -->
<div style="text-align: center; width: 100%; margin-bottom: 20px; float: left;">
<p>Adult supervision is recommended when children use scissors.<br>
© 2011 Acme United Corporation. Text and design by The Education Center, Inc.®</p>
</div>
</div>
<!--[if IE 7]> <div class="clear"></div> <![endif]--> </div>
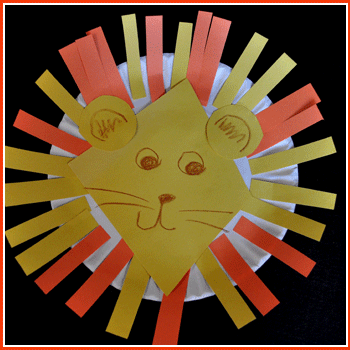
Quite a Lion
<div class="default CP-kids-wrapper" id="page-content">
<div class="clearfix"> <!-- Blue Materials Box BEGIN -->
<div id="CP_kidmain-container"> <!-- Final Project Image Begin -->
<div class="cp-subcat-mainimg"><img src="{{media url=westcottbrand/Quite-a-Lion/Wes_quitealionlg.gif}}" usemap="1379" longdesc="Classroom Activities" alt="Quite a Lion Large"></div>
<!-- Final Project Image End -->
<p style="margin-bottom:0;"><strong>The king of the jungle comes to your classroom with a simple paper-plate project. </strong></p>
<div class="material-resource">
<div class="material">
<p><strong>Materials:</strong></p>
<ul style="font-size:12px;line-height:20px;">
<li><a target="_blank" href="{{store direct_url="products/scissors/kids-scissors.html"}}">Westcott 5" Kids scissors</a></li>
<li>paper plate</li>
<li>yellow and orange construction paper </li>
<li>crayons</li>
<li>glue</li>
</ul>
</div>
<div class="resource">
<p><strong>Helpful Resources:</strong></p>
<ul style="font-size:12px;line-height:20px;">
<li><a href="{{store direct_url="products/scissors/kids-scissors/scissor-caddy.html"}}" title="Scissor Caddies"><img border="0" alt="Scissor Caddies" src="{{media url=westcottbrand/CAbuttonscissorcaddy.jpg}}" usemap="2071" ></a></li>
<li><a href="{{store direct_url="products/scissors.html"}}" title="Teachers Scissors"><img border="0" alt="Teachers Scissors" src="{{media url=westcottbrand/CAbuttonteacherscissors.jpg}}" usemap="2072"></a></li>
<li><a href="{{store direct_url="products/scissors/kids-scissors.html"}}" title="Kids Scissor Packs"><img border="0" alt="Kids Scissor Packs" src="{{media url=westcottbrand/CAbuttonkidsscissorpack.jpg}}" usemap="2073" ></a></li>
</ul>
</div>
</div>
<p> </p>
<p style="text-align:center;margin-top:5px;float:left;width:100%;clear:both;"><em>Brought to you by Westcott – The World's Favorite Scissors</em></p>
<!-- Free Scissors Banner Begin --> <!-- Free Scissors Banner End --> </div>
<!-- Blue Materials Box END --> <!-- Instructions Row Begin -->
<div style="width: 100%; margin-bottom: 20px; float: left;"> <!-- Step 1 Begin -->
<div class="cp-subleft-section"><img width="300" src="{{media url=westcottbrand/Quite-a-Lion/Wes_quitealion1.gif}}" usemap="1380" longdesc="Classroom Activities" alt="Quite a Lion Step 1">
<p><strong>Step 1</strong><br>
Cut yellow and orange paper into strips. Then spread glue along the inside edge of the plate and use the paper strips to make a lion\\\'s mane.</p>
</div>
<!-- Step 1 End --> <!-- Step 2 Begin -->
<div class="cp-subright-section"><img width="300" src="{{media url=westcottbrand/Quite-a-Lion/Wes_quitealion2.gif}}" usemap="1381" longdesc="Classroom Activities" alt="Quite a Lion Step 2">
<p><strong>Step 2</strong><br>
Cut a large diamond (head) and two circles (ears) from yellow paper. Glue them onto the plate.</p>
</div>
<!-- Step 2 End --> <!-- Step 3 Begin -->
<div class="cp-subleft-section"><img width="300" src="{{media url=westcottbrand/Quite-a-Lion/Wes_quitealion3.gif}}" usemap="1382" longdesc="Classroom Activities" alt="Quite a Lion Step 3">
<p><strong>Step 3</strong><br>
Use the crayon to add other facial details.</p>
</div>
<!-- Step 3 End --> </div>
<!-- Instructions Row End --> <!-- Footer Text Begin -->
<div style="text-align: center; width: 100%; margin-bottom: 20px; float: left;">
<p>Adult supervision is recommended when children use scissors.<br>
© 2016 Acme United Corporation. Text and design by The Education Center, Inc.®</p>
</div>
</div>
</div>
BTS Bulletin Board
<div class="default CP-kids-wrapper" id="page-content">
<div class="clearfix"> <!-- Blue Materials Box BEGIN -->
<div id="CP_kidmain-container"> <!-- Final Project Image Begin -->
<div class="cp-subcat-mainimg"><img src="{{media url=westcottbrand/BTS-Bulletin-Board/bulletinboardmain.jpg}}" usemap="2113" alt="bulletin board main"></div>
<!-- Final Project Image End -->
<p><strong>Summary: </strong><br>
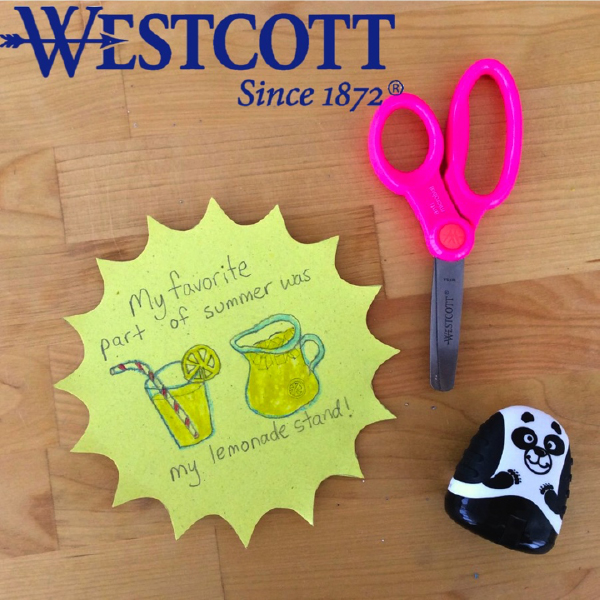
Help your students get acquainted with this fun first day of school activity! Have each student create and decorate a paper sun about the best memories from their summer vacation. Then display them all together on the classroom bulletin board. Makes a great conversation starter to break the ice on that first day of school, especially when there are new students joining the class!</p>
<div class="material-resource">
<div class="material">
<p><strong>What's Needed:</strong></p>
<ul style="font-size:12px;line-height:20px;">
<li><a href="{{store direct_url="catalogsearch/result/?q=14606"}}" target="_blank">Westcott 5" Blunt Kids Scissors with Antimicrobial Protection #14606</a></li>
<li><a href="{{store direct_url="westcott-titanium-bonded-hobby-knife-with-cushion-grip-handle-and-11-blade-13974-parent.html"}}" target="_blank">Westcott Craft Titanium Hobby Knife with Cushion Grip #13974</a></li>
<li>Westcott Panda Character Pencil Sharpener #15732</li>
<li> Yellow Construction Paper </li>
<li> Crayons </li>
<li> Pencil </li>
</ul>
</div>
<div class="resource">
<p><strong>Helpful Resources:</strong></p>
<ul style="font-size:12px;line-height:20px;">
<li><a href="{{store direct_url="products/scissors/kids-scissors/scissor-caddy.html"}}" title="Scissor Caddies"><img border="0" alt="Scissor Caddies" src="{{media url=westcottbrand/CAbuttonscissorcaddy.jpg}}" usemap="2071" ></a></li>
<li><a href="{{store direct_url="products/scissors.html"}}" title="Teachers Scissors"><img border="0" alt="Teachers Scissors" src="{{media url=westcottbrand/CAbuttonteacherscissors.jpg}}" usemap="2072"></a></li>
<li><a href="{{store direct_url="products/scissors/kids-scissors.html"}}" title="Kids Scissor Packs"><img border="0" alt="Kids Scissor Packs" src="{{media url=westcottbrand/CAbuttonkidsscissorpack.jpg}}" usemap="2073" ></a></li>
</ul>
</div>
</div>
<p> </p>
<p style="text-align:center;margin-top:5px;float:left;width:100%;clear:both;"><em>Brought to you by Westcott – The World's Favorite Scissors</em></p>
<!-- Free Scissors Banner Begin --> <!-- Free Scissors Banner End --> </div>
<!-- Blue Materials Box END --> <!-- Instructions Row Begin -->
<div style="width: 100%; margin-bottom: 20px; float: left;"> <!-- Step 1 Begin -->
<p><strong>Steps:</strong></p>
<div class="cp-subleft-section"><img width="300" src="{{media url=westcottbrand/BTS-Bulletin-Board/bb_step1.jpg}}" usemap="2114" alt="bb_step1.jpg">
<p>1) Gather up all your supplies as shown and carefully remove the sun shaped stencil from the Westcott LetterCraft Stencil Book.</p>
</div>
<!-- Step 1 End --> <!-- Step 2 Begin -->
<div class="cp-subright-section"><img width="300" src="{{media url=westcottbrand/BTS-Bulletin-Board/bb_step2.jpg}}" usemap="2115" alt="bb_step2.jpg">
<p>2) Sharpen up your pencil with the Westcott Panda Character Pencil Sharpener.</p>
</div>
<!-- Step 2 End --> <!-- Step 3 Begin --> <!-- Step 3 End --> </div>
<!-- Instructions Row End --> <!-- Instructions Row Begin -->
<div style="width: 100%; margin-bottom: 20px; float: left;"> <!-- Step 4 Begin -->
<div class="cp-subleft-section"><img width="300" src="{{media url=westcottbrand/BTS-Bulletin-Board/bb_step3.jpg}}" usemap="2116" alt="bb_step3.jpg">
<p>3) Trace the sun shape onto a piece of yellow construction paper. Then use the pencil to write your favorite summer memory. Draw a little picture with the pencil and crayons to illustrate the event.</p>
</div>
<!-- Step 1 End --> <!-- Step 2 Begin -->
<div class="cp-subright-section"><img width="300" src="{{media url=westcottbrand/BTS-Bulletin-Board/bb_step4.jpg}}" usemap="2117" alt="bb_step4.jpg">
<p>4) Lastly carefully cut out the sun shape with the Westcott 5" Blunt Kids Scissors with Antimicrobial Protection.</p>
</div>
<!-- Step 4 End --> </div>
<!-- Instructions Row End --> <!-- Footer Text Begin -->
<div style="text-align: center; width: 100%; margin-bottom: 20px; float: left;">
<p>Adult supervision is recommended when children use scissors.<br>
© 2016 Acme United Corporation. Text and design by by Marisa Pawelko</p>
</div>
</div>
<!--[if IE 7]> <div class="clear"></div> <![endif]--> </div>
Custom Binders
<div class="default CP-kids-wrapper" id="page-content">
<div class="clearfix"> <!-- Blue Materials Box BEGIN -->
<div id="CP_kidmain-container"> <!-- Final Project Image Begin -->
<div class="cp-subcat-mainimg"><img src="{{media url=westcottbrand/Custom-Binders/custombinders.jpg}}" usemap="2113" alt="custombinders"></div>
<!-- Final Project Image End -->
<p><strong>Summary: </strong><br>
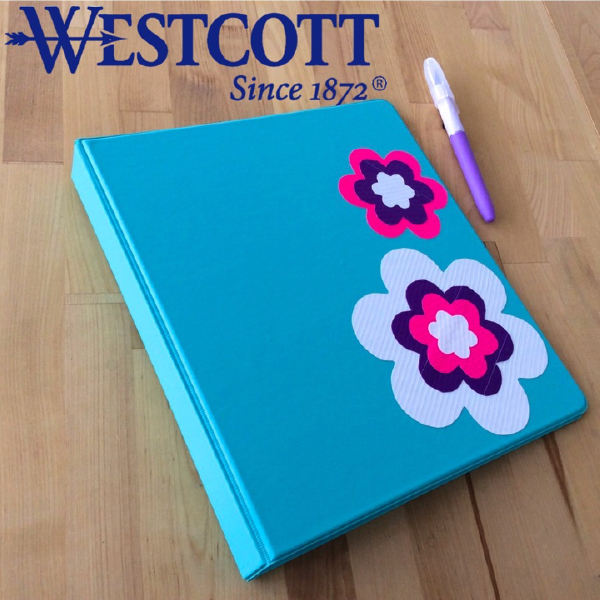
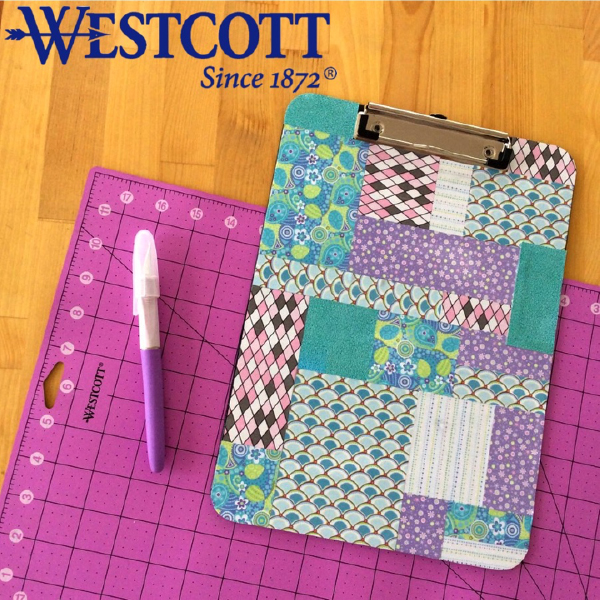
Create your own customized binders for back to school or your home office! Celebrate your own individual style with duct tape embellishments. Use this quick and easy technique to decorate book covers, clipboards, pencil cases, lunch boxes and more!</p>
<div class="material-resource">
<div class="material">
<p><strong>What's Needed:</strong></p>
<ul style="font-size:12px;line-height:20px;">
<li><a target="_blank" href="{{store direct_url="westcott-14849-8-straight-titanium-bonded-non-stick-scissors-14849.html"}}">Westcott 8" Straight Titanium Non-Stick Scissors #14849</a></li>
<li><a target="_blank" href="{{store direct_url="westcott-titanium-bonded-hobby-knife-with-cushion-grip-handle-and-11-blade-13974-parent.html"}}" target="_blank"> Westcott Craft Titanium Hobby Knife with Cushion Grip #13974</a></li>
<li> Westcott Self-Healing Cutting Mat #15352</li>
<li> <a target="_blank" href="{{store direct_url="westcott-ipoint-kleenearth-evolution-recycled-electric-pencil-sharpener-15085.html"}}">Westcott KleenEarth iPoint Evolution Pencil Sharpener #15085</a></li>
<li> Binder </li>
<li> Duct Tape Rolls in Assorted Colors </li>
<li> Pencil </li>
</ul >
</div>
<div class="resource">
<p><strong>Helpful Resources:</strong></p>
<ul style="font-size:12px;line-height:20px;">
<li><a href="{{store direct_url="products/scissors/kids-scissors/scissor-caddy.html"}}" title="Scissor Caddies"><img border="0" alt="Scissor Caddies" src="{{media url=westcottbrand/CAbuttonscissorcaddy.jpg}}" usemap="2071" ></a></li>
<li><a href="{{store direct_url="products/scissors.html"}}" title="Teachers Scissors"><img border="0" alt="Teachers Scissors" src="{{media url=westcottbrand/CAbuttonteacherscissors.jpg}}" usemap="2072"></a></li>
<li><a href="{{store direct_url="products/scissors/kids-scissors.html"}}" title="Kids Scissor Packs"><img border="0" alt="Kids Scissor Packs" src="{{media url=westcottbrand/CAbuttonkidsscissorpack.jpg}}" usemap="2073" ></a></li>
</ul>
</div>
</div>
<p> </p>
<p style="text-align:center;margin-top:5px;float:left;width:100%;clear:both;"><em>Brought to you by Westcott – The World's Favorite Scissors</em></p>
<!-- Free Scissors Banner Begin --> <!-- Free Scissors Banner End --> </div>
<!-- Blue Materials Box END --> <!-- Instructions Row Begin -->
<div style="width: 100%; margin-bottom: 20px; float: left;"> <!-- Step 1 Begin -->
<p><strong>Steps:</strong></p>
<div class="cp-subleft-section"><img width="300" src="{{media url=westcottbrand/Custom-Binders/cb_step1.jpg}}" usemap="2114" alt="cb step1">
<p>1) Cut several strips of duct tape with the Westcott 8" Straight Titanium Non-Stick Scissors. Lay the strips onto the Westcott Self-Healing Cutting Mat, overlapping each strip by 1/4".</p>
</div>
<!-- Step 1 End --> <!-- Step 2 Begin -->
<div class="cp-subright-section"><img width="300" src="{{media url=westcottbrand/Custom-Binders/cb_step2.jpg}}" usemap="2115" alt="cb step2">
<p>2) Sharpen up your pencil with the Westcott KleenEarth iPoint Evolution Pencil Sharpener. Then select the design of your choice from the Westcott LetterCraft Stencil Book.</p>
</div>
<!-- Step 2 End --> <!-- Step 3 Begin --> <!-- Step 3 End --> </div>
<!-- Instructions Row End --> <!-- Instructions Row Begin -->
<div style="width: 100%; margin-bottom: 20px; float: left;"> <!-- Step 4 Begin -->
<div class="cp-subleft-section"><img width="300" src="{{media url=westcottbrand/Custom-Binders/cb_step3.jpg}}" usemap="2116" alt="cb step3">
<p>3) Trace the stencil onto the duct tape. Then cut away the excess tape with the Westcott Craft Titanium Hobby Knife with Cushion Grip.</p>
</div>
<!-- Step 1 End --> <!-- Step 2 Begin -->
<div class="cp-subright-section"><img width="300" src="{{media url=westcottbrand/Custom-Binders/cb_step4.jpg}}" usemap="2117" alt="cb step4">
<p>4) Repeat this process until you've created several shapes in different sizes and colors. Then layer the pieces on top of each other for a graduated effect using the Westcott Self-Healing Cutting Mat as a work surface. Lastly position the layered assemblies onto your binder!</p>
</div>
<!-- Step 4 End --> </div>
<!-- Instructions Row End --> <!-- Footer Text Begin -->
<div style="text-align: center; width: 100%; margin-bottom: 20px; float: left;">
<p>Adult supervision is recommended when children use scissors.<br>
© 2016 Acme United Corporation. Text and design by by Marisa Pawelko</p>
</div>
</div>
<!--[if IE 7]> <div class="clear"></div> <![endif]--> </div>
Decoupage Clipboard
<div class="default CP-kids-wrapper" id="page-content">
<div class="clearfix"> <!-- Blue Materials Box BEGIN -->
<div id="CP_kidmain-container"> <!-- Final Project Image Begin -->
<div class="cp-subcat-mainimg"><img src="{{media url=westcottbrand/Decoupage-Clipboard/decoupageclipboardmain.jpg}}" usemap="2113" title="Decoupage Clipboard Main"></div>
<!-- Final Project Image End -->
<p><strong>Summary: </strong><br>
This adorable decoupage clipboard project blends form and function to create the illusion of a quilt. A great way to use up your scrap bits of paper! Our Titanium Bonded Trimmer creates precise right angles and measurements so the pieces line up easily! Makes a great gift for teacher or your friends at the office!</p>
<div class="material-resource">
<div class="material">
<p><strong>What's Needed:</strong></p>
<ul style="font-size:12px;line-height:20px;">
<li>Westcott 12" Titanium Bonded Trimmer #13779</li>
<li> Westcott Self-Healing Cutting Mat #15352 </li>
<li> <a href="{{store direct_url="westcott-titanium-bonded-hobby-knife-with-cushion-grip-handle-and-11-blade-13974-parent.html"}}" target="_blank"> Westcott Craft Titanium Hobby Knife with Cushion Grip #13974</a></li>
<li> Clipboard </li>
<li> Decoupage Adhesive </li>
<li> Paint Brush </li>
<li> Scrap Paper </li>
</ul>
</div>
<div class="resource">
<p><strong>Helpful Resources:</strong></p>
<ul style="font-size:12px;line-height:20px;">
<li><a href="{{store direct_url="products/scissors/kids-scissors/scissor-caddy.html"}}" title="Scissor Caddies"><img border="0" alt="Scissor Caddies" src="{{media url=westcottbrand/CAbuttonscissorcaddy.jpg}}" usemap="2071" ></a></li>
<li><a href="{{store direct_url="products/scissors.html"}}" title="Teachers Scissors"><img border="0" alt="Teachers Scissors" src="{{media url=westcottbrand/CAbuttonteacherscissors.jpg}}" usemap="2072"></a></li>
<li><a href="{{store direct_url="products/scissors/kids-scissors.html"}}" title="Kids Scissor Packs"><img border="0" alt="Kids Scissor Packs" src="{{media url=westcottbrand/CAbuttonkidsscissorpack.jpg}}" usemap="2073" ></a></li>
</ul>
</div>
</div>
<p> </p>
<p style="text-align:center;margin-top:5px;float:left;width:100%;clear:both;"><em>Brought to you by Westcott – The World's Favorite Scissors</em></p>
<!-- Free Scissors Banner Begin --> <!-- Free Scissors Banner End --> </div>
<!-- Blue Materials Box END --> <!-- Instructions Row Begin -->
<div style="width: 100%; margin-bottom: 20px; float: left;"> <!-- Step 1 Begin -->
<p><strong>Steps:</strong></p>
<div class="cp-subleft-section"><img width="300" src="{{media url=westcottbrand/Decoupage-Clipboard/dc_step1.jpg}}" usemap="2114" alt="q_step1.jpg">
<p>1) With the Westcott 12" Titanium Bonded Trimmer, cut several rectangles and squares of decorative paper in varying sizes.</p>
</div>
<!-- Step 1 End --> <!-- Step 2 Begin -->
<div class="cp-subright-section"><img width="300" src="{{media url=westcottbrand/Decoupage-Clipboard/dc_step2.jpg}}" usemap="2115" alt="q_step2.jpg">
<p>2) Protect your work surface with the Westcott Self-Healing Cutting Mat. Use the paintbrush to apply the decoupage adhesive to a piece of paper and position it onto the clipboard, lining up the edges.</p>
</div>
<!-- Step 2 End --> <!-- Step 3 Begin --> <!-- Step 3 End --> </div>
<!-- Instructions Row End --> <!-- Instructions Row Begin -->
<div style="width: 100%; margin-bottom: 20px; float: left;"> <!-- Step 4 Begin -->
<div class="cp-subleft-section"><img width="300" src="{{media url=westcottbrand/Decoupage-Clipboard/dc_step3.jpg}}" usemap="2116" alt="q_step3.jpg">
<p>3) Repeat this process by applying more pieces, always being sure to align the pieces parallel and perpendicularly.</p>
</div>
<!-- Step 1 End --> <!-- Step 2 Begin -->
<div class="cp-subright-section"><img width="300" src="{{media url=westcottbrand/Decoupage-Clipboard/dc_step4.jpg}}" usemap="2117" alt="q_step4.jpg">
<p>4) For the corners, allow the paper to extend beyond the edge of the clipboard until dry. Then use the Westcott Craft Titanium Hobby Knife with Cushion Grip to trim away the excess paper, using the rounded corners of the clipboard as a guide. Once you\\\'ve covered the entire clipboard, apply a layer of decoupage to seal the entire surface and set aside to dry.</p>
</div>
<!-- Step 4 End --> </div>
<!-- Instructions Row End --> <!-- Footer Text Begin -->
<div style="text-align: center; width: 100%; margin-bottom: 20px; float: left;">
<p>Adult supervision is recommended when children use scissors.<br>
© 2016 Acme United Corporation. Text and design by Marisa Pawelko</p>
</div>
</div>
<!--[if IE 7]> <div class="clear"></div> <![endif]--> </div>
Graduation Craft
<div class="default CP-kids-wrapper" id="page-content">
<div class="clearfix"> <!-- Blue Materials Box BEGIN -->
<div id="CP_kidmain-container"> <!-- Final Project Image Begin -->
<div class="cp-subcat-mainimg"><img src="{{media url=westcottbrand/Graduation-Craft/Graduationcraftmain.jpg}}" usemap="2113" alt="Graduation craft"></div>
<!-- Final Project Image End -->
<p><strong>Summary: </strong><br>
Stand out on graduation with your own personalized cap!</p>
<div class="material-resource">
<div class="material">
<p><strong>What's Needed:</strong></p>
<ul style="font-size:12px;line-height:20px;">
<li> <a target="_blank" href="{{store direct_url="westcott-kids-5-ergo-jr-blunt-scissors-assorted-colors-16670-parent.html"}}">Westcott 5" Ergo Jr.™, Blunt #16670</a></li>
<li><a href="{{store direct_url="westcott-12-twist-it-flexible-ruler.html"}}" target="_blank">Westcott 12" Twist It Flexible Ruler (16292)</a></li>
<li> Heavy Weight Paper </li>
<li> Crayons </li>
<li> Glue </li>
<li> Yarn </li>
</ul>
</div>
</div>
<p style="text-align:center; margin-top:5px;"> </p>
<p style="text-align:center;margin-top:5px;float:left;width:100%;clear:both;"><em>Brought to you by Westcott – The World's Favorite Scissors</em></p>
<!-- Free Scissors Banner Begin --> <!-- Free Scissors Banner End --> </div>
<!-- Blue Materials Box END --> <!-- Instructions Row Begin -->
<div style="width: 100%; margin-bottom: 20px; float: left;"> <!-- Step 1 Begin -->
<p><strong>Steps:</strong></p>
<div class="cp-subleft-section"><img width="300" src="{{media url=westcottbrand/Graduation-Craft/gc_step1.jpg}}" usemap="2114" alt="gc_step1.jpg">
<p>1) Gather all your materials.</p>
</div>
<!-- Step 1 End --> <!-- Step 2 Begin -->
<div class="cp-subright-section"><img width="300" src="{{media url=westcottbrand/Graduation-Craft/gc_step2.jpg}}" usemap="2115" alt="gc_step2.jpg">
<p>2) Measure a 9"x9" square and a 2 ½" band. The square for the top of the graduation cap and the band to fit each students head size. Make sure to measure with your Westcott Twist-it Ruler!</p>
</div>
<!-- Step 2 End --> <!-- Step 3 Begin --> <!-- Step 3 End --> </div>
<!-- Instructions Row End --> <!-- Instructions Row Begin -->
<div style="width: 100%; margin-bottom: 20px; float: left;"> <!-- Step 4 Begin -->
<div class="cp-subleft-section"><img width="300" src="{{media url=westcottbrand/Graduation-Craft/gc_step3.jpg}}" usemap="2116" alt="gc_step3.jpg">
<p>3) Next, each student will cut out the graduation cap and band with Westcott Kids 5" Ergo Jr.™ Blunt Scissors.</p>
</div>
<!-- Step 1 End --> <!-- Step 2 Begin -->
<div class="cp-subright-section"><img width="300" src="{{media url=westcottbrand/Graduation-Craft/gc_step4.jpg}}" usemap="2115" alt="gc_step4.jpg">
<p>4) After the cap and band are cut out, the student can decorate with crayons. Once decorated, staple the band to the size of the students head and glue the cap and band together (letting it sit for a couple hours to dry). Last, knot your yarn and glue to the top of the cap for the tassel!</p>
</div>
<!-- Step 4 End --> </div>
<!-- Instructions Row End --> <!-- Footer Text Begin -->
<div style="text-align: center; width: 100%; margin-bottom: 20px; float: left;">
<p>Adult supervision is recommended when children use scissors.<br>
© 2016 Acme United Corporation</p>
</div>
</div>
<!--[if IE 7]> <div class="clear"></div> <![endif]--> </div>
Pompom People
<div class="default CP-kids-wrapper" id="page-content">
<div class="clearfix">
<!-- Blue Materials Box BEGIN -->
<div id="CP_kidmain-container">
<!-- Final Project Image Begin -->
<div class="cp-subcat-mainimg"><img src="{{media url=westcottbrand/Pompom-People/pompompeoplemain.jpg}}" title="Pompom People"></div>
<!-- Final Project Image End -->
<p><strong>Summary: </strong><br>
What's puffy and cute and fun all over? These cute little pom-pom characters! They make a perfect rainy day or camp activity for the kids! Create your own unique characters by cutting up craft foam with The World's Favorite Scissors!</p>
<div class="what-need">
<p><strong>What's Needed:</strong></p>
<ul style="font-size:12px;line-height:20px;">
<li>Westcott 5" Pointed Antimicrobial Scissors #14607</li>
<li> Pom-Poms</li>
<li> Craft Foam</li>
<li> School Glue</li>
<li> Google Eyes</li>
</ul>
</div>
<p style="text-align:center;margin-top:5px;float:left;width:100%;clear:both;"><em>Brought to you by Westcott – The World's Favorite Scissors</em></p>
<!-- Free Scissors Banner Begin -->
<!-- Free Scissors Banner End -->
</div>
<!-- Blue Materials Box END -->
<!-- Instructions Row Begin -->
<div style="width: 100%; margin-bottom: 20px; float: left;">
<!-- Step 1 Begin -->
<p><strong>Steps:</strong></p>
<div class="cp-subleft-section"><img width="300" src="{{media url=westcottbrand/Pompom-People/ppstep1.jpg}}" title="ppstep1.jpg">
<p>1) Gather up your supplies.</p>
</div>
<!-- Step 1 End -->
<!-- Step 2 Begin -->
<div class="cp-subright-section"><img width="300" src="{{media url=westcottbrand/Pompom-People/ppstep2.jpg}}" title="ppstep2.jpg">
<p>2) With the Westcott 5" Pointed Antimicrobial Scissors, cut out foam shapes for the arms, feet, mouth and accessories such as a crown or even sunglasses!</p>
</div>
<!-- Step 2 End -->
<!-- Step 3 Begin -->
<!-- Step 3 End -->
</div>
<!-- Instructions Row End -->
<!-- Instructions Row Begin -->
<div style="width: 100%; margin-bottom: 20px; float: left;">
<!-- Step 4 Begin -->
<div class="cp-subleft-section"><img width="300" src="{{media url=westcottbrand/Pompom-People/ppstep3.jpg}}" title="ppstep3.jpg">
<p>3) Assemble the character by separating the pompom fur and gluing the foam pieces in place with school glue.</p>
</div>
<!-- Instructions Row End -->
<!-- Footer Text Begin -->
<div style="text-align: center; width: 100%; margin-bottom: 20px; float: left;">
<p>Adult supervision is recommended when children use scissors.<br>
© 2016 Acme United Corporation. Text and design by Marisa Pawelko</p>
</div>
</div>
</div>
</div>
Pond Life
<div class="default CP-wrapper" id="page-content">
<h1>Classroom Activities - Pond Life</h1>
<div class="clearfix"> <!-- Blue Materials Box BEGIN -->
<div id="CP_main-container"> <!-- Final Project Image Begin -->
<div class="cp-subcat-mainimg"><img src="{{media url=westcottbrand/Pond-life/Pondlifemain.jpg}} " usemap="2113" alt="Pond life"></div>
<!-- Final Project Image End -->
<p><strong>Summary: </strong><br>
Encourage students to learn what kind of creatures live in the pond!</p>
<div class="what-need">
<p><strong>What's Needed:</strong></p>
<ul style="font-size:12px;line-height:20px;">
<li> <a target="_blank" href="{{store direct_url="westcott-5-soft-handle-scissors-blunt-1.html"}}">Westcott 5" Soft Handle Scissors, Blunt #14726</a></li>
<li><a target="_blank" href="{{store direct_url="westcott-crayon-sharpener-assorted-colors-1.html"}}">Westcott Battery Operated Crayon Sharpener, Assorted Colors #14213</a></li>
<li> Colored Construction Paper </li>
<li> Crayons </li>
<li> Double Sided Tape </li>
</ul>
</div>
<p style="text-align:center;margin-top:5px;float:left;width:100%;clear:both;"><em>Brought to you by Westcott – The World's Favorite Scissors</em></p>
<!-- Free Scissors Banner Begin --> <!-- Free Scissors Banner End --> </div>
<!-- Blue Materials Box END --> <!-- Instructions Row Begin -->
<div style="width: 100%; margin-bottom: 20px; float: left;"> <!-- Step 1 Begin -->
<p><strong>Steps:</strong></p>
<div class="cp-subleft-section"><img width="300" src="{{media url=westcottbrand/Pond-life/pl_step1.jpg}}" usemap="2114" alt="pl_step1.jpg">
<p>1) Gather all your materials and if needed sharpen your crayons with Westcott Battery Operated Crayon Sharpener.</p>
</div>
<!-- Step 1 End --> <!-- Step 2 Begin -->
<div class="cp-subright-section"><img width="300" src="{{media url=westcottbrand/Pond-life/pl_step2.jpg}}" usemap="2115" alt="pl_step2.jpg">
<p>2) Have your students cut out all the creatures for your pond using Westcott 5" Soft Handle Blunt Scissors.</p>
</div>
<!-- Step 2 End --> <!-- Step 3 Begin --> <!-- Step 3 End --> </div>
<!-- Instructions Row End --> <!-- Instructions Row Begin -->
<div style="width: 100%; margin-bottom: 20px; float: left;"> <!-- Step 4 Begin -->
<div class="cp-subleft-section"><img width="300" src="{{media url=westcottbrand/Pond-life/pl_step3.jpg}}" usemap="2116" alt="pl_step3.jpg">
<p>3) Once all the creatures are cut out, the students can decorate and add to the pond with the double sided tape!</p>
</div>
<!-- Step 1 End --> <!-- Step 2 Begin --> <!-- Step 4 End --> </div>
<!-- Instructions Row End --> <!-- Footer Text Begin -->
<div style="text-align: center; width: 100%; margin-bottom: 20px; float: left;">
<p>Adult supervision is recommended when children use scissors.<br>
© 2016 Acme United Corporation.</p>
</div>
</div>
<!--[if IE 7]> <div class="clear"></div> <![endif]--> </div>
Quilling
<div class="default CP-wrapper" id="page-content">
<div class="clearfix"> <!-- Blue Materials Box BEGIN -->
<div id="CP_main-container"> <!-- Final Project Image Begin -->
<div class="cp-subcat-mainimg"><img src="{{media url=westcottbrand/Quilling/quillingmain.jpg}}" usemap="2113" alt="Quilling"></div>
<!-- Final Project Image End -->
<p><strong>Summary: </strong><br>
Quilling is an art form that involves the use of strips of paper that are rolled, shaped, and glued together to create decorative designs. Westcott Brand's General Purpose Template serves as a handy guide to create quilled circles, triangles, hexagons and more for your beautiful paper creations!</p>
<div class="material-resource">
<div class="material">
<p><strong>What's Needed:</strong></p>
<ul style="font-size:12px;line-height:20px;">
<li><a href="{{store direct_url="westcott-12-premium-trimair-titanium-paper-trimmer-wide-pink-15165-parent.html"}}" target="_blank"> Westcott TrimAir Wide Body Trimmer #15165</a></li>
<li> <a href="{{store direct_url="westcott-general-purpose-template.html"}}" target="_blank">Westcott General Purpose Template #T-816</a></li>
<li> Colored Paper </li>
<li> Colored Cardstock </li>
<li> School Glue </li>
<li> Small Piece of Foam Core </li>
<li> Stick Pins </li>
</ul>
</div>
<div class="resource">
<p><strong>Helpful Resources:</strong></p>
<ul style="font-size:12px;line-height:20px;">
<li><a href="{{store direct_url="products/scissors/kids-scissors/scissor-caddy.html"}}" title="Scissor Caddies"><img border="0" alt="Scissor Caddies" src="{{media url=westcottbrand/CAbuttonscissorcaddy.jpg}}" usemap="2071" ></a></li>
<li><a href="{{store direct_url="products/scissors.html"}}" title="Teachers Scissors"><img border="0" alt="Teachers Scissors" src="{{media url=westcottbrand/CAbuttonteacherscissors.jpg}}" usemap="2072"></a></li>
<li><a href="{{store direct_url="products/scissors/kids-scissors.html"}}" title="Kids Scissor Packs"><img border="0" alt="Kids Scissor Packs" src="{{media url=westcottbrand/CAbuttonkidsscissorpack.jpg}}" usemap="2073" ></a></li>
</ul>
</div>
</div>
<p> </p>
<p style="text-align:center;margin-top:5px;float:left;width:100%;clear:both;"><em>Brought to you by Westcott – The World's Favorite Scissors</em></p>
<!-- Free Scissors Banner Begin --> <!-- Free Scissors Banner End --> </div>
<!-- Blue Materials Box END --> <!-- Instructions Row Begin -->
<div style="width: 100%; margin-bottom: 20px; float: left;"> <!-- Step 1 Begin -->
<p><strong>Steps:</strong></p>
<div class="cp-subleft-section"><img width="300" src="{{media url=westcottbrand/Quilling/q_step1.jpg}}" usemap="2114" alt="q_step1.jpg">
<p>1) With the Westcott TrimAir Wide Body Trimmer, slice several thin strips of paper in various colors.</p>
</div>
<!-- Step 1 End --> <!-- Step 2 Begin -->
<div class="cp-subright-section"><img width="300" src="{{media url=westcottbrand/Quilling/q_step2.jpg}}" usemap="2115" alt="q_step2.jpg">
<p>2) Roll the strips into shapes using the Westcott General Purpose Template as a guide. With stick pins, secure the rolled piece inside of the template and on the piece of foam core. Then use another stick pin to apply a little drop of glue to secure the end of the rolled piece and allow to dry.</p>
</div>
<!-- Step 2 End --> <!-- Step 3 Begin --> <!-- Step 3 End --> </div>
<!-- Instructions Row End --> <!-- Instructions Row Begin -->
<div style="width: 100%; margin-bottom: 20px; float: left;"> <!-- Step 4 Begin -->
<div class="cp-subleft-section"><img width="300" src="{{media url=westcottbrand/Quilling/q_step3.jpg}}" usemap="2116" alt="q_step3.jpg">
<p>3) Continue this process to create a variety of quilled shapes in different colors and sizes.</p>
</div>
<!-- Step 1 End --> <!-- Step 2 Begin -->
<div class="cp-subright-section"><img width="300" src="{{media url=westcottbrand/Quilling/q_step4.jpg}}" usemap="2117" alt="q_step4.jpg">
<p>4) Next cut several rectilinear shapes of cardstock with the Westcott TrimAir Wide Body Trimmer. Arrange and secure these pieces onto another piece of cardstock with school glue, to create frames for your quilled shapes. Then glue your quilled shapes onto the rectilinear shapes and set aside to dry.</p>
</div>
<!-- Step 4 End --> </div>
<!-- Instructions Row End --> <!-- Footer Text Begin -->
<div style="text-align: center; width: 100%; margin-bottom: 20px; float: left;">
<p>Adult supervision is recommended when children use scissors.<br>
© 2016 Acme United Corporation. Text and by Marisa Pawelko</p>
</div>
</div>
<!--[if IE 7]> <div class="clear"></div> <![endif]--> </div>
Stoplight
<div class="default CP-kids-wrapper" id="page-content">
<div class="clearfix">
<!-- Blue Materials Box BEGIN -->
<div id="CP_kidmain-container">
<!-- Final Project Image Begin -->
<div class="cp-subcat-mainimg"><img src="{{media url=westcottbrand/Spotlight/stoplightmain.jpg}}" usemap="2113" alt="Stop light"></div>
<!-- Final Project Image End -->
<p><strong>Summary: </strong><br>
Motivate your students to improve their classroom conduct with this eye catching visual aide for the classroom! Each clothespin features a student's name. Start the day off with everyone on the green light. Throughout the day, if necessary, move their name to the yellow light as a warning, and to the red light for misbehaving. Then they can work their way back up again with improved behavior. As an additional motivator, give them a prize for staying on the green light all day or all week!</p>
<div class="material-resource">
<div class="material">
<p><strong>What's Needed:</strong></p>
<ul style="font-size:12px;line-height:20px;">
<li> <a href="{{store direct_url="westcott-14849-8-straight-titanium-bonded-non-stick-scissors-14849.html}}" target="_blank">Westcott 8" Straight Titanium Non-Stick Scissors #14849</a></li>
<li> <a target="_blank" href="{{store direct_url="westcott-lettercraft-3-4-and-1-stencil-helvetica-font-15844-parent.html"}}">Westcott LetterCraft Stencil Lettering in Helvetica 3/4" and 1" #15844</a> </li>
<li> <a target="_blank" href="{{store direct_url="westcott-designer-compass-set-with-carrying-case-dcs-10-parent.html"}}">Westcott Designer Compass Set #DCS-10</a> </li>
<li> Westcott KleenEarth 12" Kids Recycled Ruler #500-14974</li>
<li> Construction Paper in Red, Yellow, Green, Black and White </li>
<li> Permanent Marker </li>
<li> Glue Stick </li>
<li> Clothespins </li>
<li> Masking Tape </li>
</ul>
</div>
<div class="resource">
<p><strong>Helpful Resources:</strong></p>
<ul style="font-size:12px;line-height:20px;">
<li><a href="{{store direct_url="products/scissors/kids-scissors/scissor-caddy.html"}}" title="Scissor Caddies"><img border="0" alt="Scissor Caddies" src="{{media url=westcottbrand/CAbuttonscissorcaddy.jpg}}" usemap="2071" ></a></li>
<li><a href="{{store direct_url="products/scissors.html"}}" title="Teachers Scissors"><img border="0" alt="Teachers Scissors" src="{{media url=westcottbrand/CAbuttonteacherscissors.jpg}}" usemap="2072"></a></li>
<li><a href="{{store direct_url="products/scissors/kids-scissors.html"}}" title="Kids Scissor Packs"><img border="0" alt="Kids Scissor Packs" src="{{media url=westcottbrand/CAbuttonkidsscissorpack.jpg}}" usemap="2073" ></a></li>
</ul>
</div>
</div>
<p> </p>
<p style="text-align:center;margin-top:5px;float:left;width:100%;clear:both;"><em>Brought to you by Westcott – The World's Favorite Scissors</em></p>
<!-- Free Scissors Banner Begin -->
<!-- Free Scissors Banner End -->
</div>
<!-- Blue Materials Box END -->
<!-- Instructions Row Begin -->
<div style="width: 100%; margin-bottom: 20px; float: left;">
<!-- Step 1 Begin -->
<p><strong>Steps:</strong></p>
<div class="cp-subleft-section"><img width="300" src="{{media url=westcottbrand/Spotlight/sl_step1.jpg}}" usemap="2114" alt="sl_step1.jpg">
<p>1) With the Westcott Designer Compass, trace 3 large circles for the stoplight. Cut them out with the Westcott 8" Straight Titanium Non-Stick Scissors.</p>
</div>
<!-- Step 1 End -->
<!-- Step 2 Begin -->
<div class="cp-subright-section"><img width="300" src="{{media url=westcottbrand/Spotlight/sl_step2.jpg}}" usemap="2115" alt="sl_step2.jpg">
<p>2) The cut three black rectangles for connecters and use the glue stick to assemble the stoplight. Then cut small rectangles out of white paper and write the name of each student onto each piece with the permanent marker. With the Westcott 8" Straight Titanium Non-Stick Scissors, cut a small piece of masking tape for each name and use it to adhere the name tags to the clothespins.</p>
</div>
<!-- Step 2 End -->
<!-- Step 3 Begin -->
<!-- Step 3 End -->
</div>
<!-- Instructions Row End -->
<!-- Instructions Row Begin -->
<div style="width: 100%; margin-bottom: 20px; float: left;">
<!-- Step 4 Begin -->
<div class="cp-subleft-section"><img width="300" src="{{media url=westcottbrand/Spotlight/sl_step3.jpg}}" usemap="2116" alt="sl_step3.jpg">
<p>3) To create the header board, draw some guidelines using the mechanical pencil from the Westcott Designer Compass Set and the Westcott KleenEarth 12" Kids Recycled Ruler. Then with the mechanical pencil, trace the Westcott LetterCraft Stencil Lettering to create the words for the top. Feel free to customize the name of this motivational stoplight to suit your classroom. Once you've traced out all the words, fill them in with the permanent marker and erase the guidelines with the eraser included in the Westcott Designer Compass Set.</p>
</div>
<!-- Step 1 End -->
<!-- Step 2 Begin -->
<div class="cp-subright-section"><img width="300" src="{{media url=westcottbrand/Spotlight/sl_step4.jpg}}" usemap="2117" alt="sl_step4.jpg">
<p>4) Attach the header board to the top of the stoplight with the glue stick and hang it on the wall. Then get ready for a major improvement in the classroom behavior of your students!</p>
</div>
<!-- Step 4 End -->
</div>
<!-- Instructions Row End -->
<!-- Footer Text Begin -->
<div style="text-align: center; width: 100%; margin-bottom: 20px; float: left;">
<p>Adult supervision is recommended when children use scissors.<br>
©
<!--<script type="text/javascript">
//var today = new Date()
//var year = today.getFullYear()
//document.write(year)
</script>-->
2016
Acme United Corporation. Text and design by Marisa Pawelko</p>
</div>
</div>
<!--[if IE 7]>
<div class="clear"></div>
<![endif]-->
</div>
Water Bottle Garden
<div class="default CP-kids-wrapper" id="page-content">
<h1>Classroom Activities - Water Bottle Garden</h1>
<div class="clearfix"> <!-- Blue Materials Box BEGIN -->
<div id="CP_kidmain-container"> <!-- Final Project Image Begin -->
<div class="cp-subcat-mainimg"><img src="{{media url=westcottbrand/Water-Bottle-Garden/waterbottlegarden.jpg}}" usemap="2113" alt="Water bottle garden"></div>
<!-- Final Project Image End -->
<p><strong>Summary: </strong><br>
Vertical gardening is all the rage these days! And what better way to explore the topic than with this fun recycled water bottle planter project. Have each student create a water bottle planter and then string them together vertically to create a beautiful community garden for your school! Watch the tutorial <a target="_blank" href="https://www.youtube.com/watch?v=QMa72L-NnJY">Here!</a></p>
<div class="material-resource">
<div class="material">
<p><strong>What's Needed:</strong></p>
<ul style="font-size:12px;line-height:20px;">
<li><a href="{{store direct_url="catalogsearch/result/?q=14607"}}" target="_blank">Westcott 5" Pointed Kids Scissors with Antimicrobial Protection #14607</a></li>
<li>Westcott 5" Pointed Kids Non-Stick Antimicrobial Scissors #14901</li>
<li> <a href="{{store direct_url="westcott-titanium-bonded-hobby-knife-with-cushion-grip-handle-and-11-blade-13974-parent.html"}}" target="_blank">Westcott Titanium Cushion Grip Hobby Knife #13974(for teacher use)</a></li>
<li> Plastic Water Bottle </li>
<li> Duct Tape </li>
<li> Yarn </li>
<li> Soil </li>
<li> Plants or Seeds </li>
</ul>
</div>
<div class="resource">
<p><strong>Helpful Resources:</strong></p>
<ul style="font-size:12px;line-height:20px;">
<li><a href="{{store direct_url="products/scissors/kids-scissors/scissor-caddy.html"}}" title="Scissor Caddies"><img border="0" alt="Scissor Caddies" src="{{media url=westcottbrand/CAbuttonscissorcaddy.jpg}}" usemap="2071" ></a></li>
<li><a href="{{store direct_url="products/scissors.html"}}" title="Teachers Scissors"><img border="0" alt="Teachers Scissors" src="{{media url=westcottbrand/CAbuttonteacherscissors.jpg}}" usemap="2072"></a></li>
<li><a href="{{store direct_url="products/scissors/kids-scissors.html"}}" title="Kids Scissor Packs"><img border="0" alt="Kids Scissor Packs" src="{{media url=westcottbrand/CAbuttonkidsscissorpack.jpg}}" usemap="2073" ></a></li>
</ul>
</div>
</div>
<p> </p>
<p style="text-align:center;margin-top:5px;float:left;width:100%;clear:both;"><em>Brought to you by Westcott – The World's Favorite Scissors</em></p>
<!-- Free Scissors Banner Begin --> <!-- Free Scissors Banner End --> </div>
<!-- Blue Materials Box END --> <!-- Instructions Row Begin -->
<div style="width: 100%; margin-bottom: 20px; float: left;"> <!-- Step 1 Begin -->
<p><strong>Steps:</strong></p>
<div class="cp-subleft-section"><img width="300" src="{{media url=westcottbrand/Water-Bottle-Garden/wbg_step1.jpg}}" usemap="2114" alt="wbg_step1.jpg">
<p>1) With the Westcott Titanium Cushion Grip Hobby Knife prepare the bottles for the students by beginning the cut for the opening at the top of the planter. This gives them a place to begin cutting with the scissors. Also make several slits on the other side of the bottle for drainage. When linked together the water will flow down from planter to planter.</p>
</div>
<!-- Step 1 End --> <!-- Step 2 Begin -->
<div class="cp-subright-section"><img width="300" src="{{media url=westcottbrand/Water-Bottle-Garden/wbg_step2.jpg}}" usemap="2115" alt="wbg_step2.jpg">
<p>2) Have the students cut the opening into the side of the bottle with the Westcott 5" Pointed Kids Scissors with Antimicrobial Protection.</p>
</div>
<!-- Step 2 End --> <!-- Step 3 Begin --> <!-- Step 3 End --> </div>
<!-- Instructions Row End --> <!-- Instructions Row Begin -->
<div style="width: 100%; margin-bottom: 20px; float: left;"> <!-- Step 4 Begin -->
<div class="cp-subleft-section"><img width="300" src="{{media url=westcottbrand/Water-Bottle-Garden/wbg_step3.jpg}}" usemap="2116" alt="wbg_step3.jpg">
<p>3) Next the students are ready to decorate their planters with pieces of colorful duct tape cut with the Westcott 5" Pointed Non-Stick Kids Scissors with Antimicrobial Protection.</p>
</div>
<!-- Step 1 End --> <!-- Step 2 Begin -->
<div class="cp-subright-section"><img width="300" src="{{media url=westcottbrand/Water-Bottle-Garden/wbg_step4.jpg}}" usemap="2117" alt="wbg_step4.jpg">
<p>4) Lastly have the students cut some yarn with the Westcott 5" Pointed Kids Scissors with Antimicrobial Protection to attach to each end of the bottle. For this design we twisted two contrasting colors of yarn together. Then you are ready to string them all together and begin planting your hanging vertical garden!</p>
</div>
<!-- Step 4 End --> </div>
<!-- Instructions Row End --> <!-- Footer Text Begin -->
<div style="text-align: center; width: 100%; margin-bottom: 20px; float: left;">
<p>Adult supervision is recommended when children use scissors.<br>
© <!--<script type="text/javascript">// var today = new Date(); //var year = today.getFullYear(); //document.write(year);</script>--> 2016 Acme United Corporation. Text and design by Marisa Pawelko</p>
</div>
</div>
<!--[if IE 7]> <div class="clear"></div> <![endif]--> </div>
Glue Gun Reusable Stencils
<div id="page-content" class="default CP-kids-wrapper">
<div class="clearfix"><!-- Blue Materials Box BEGIN -->
<div id="CP_kidmain-container"><!-- Final Project Image Begin -->
<div class="cp-subcat-mainimg"><img alt="Glue Gun Reusable Stencils" src="{{media url=wysiwyg/glue_gun_stencils_3.png}}" /></div>
<!-- Final Project Image End -->
<p style="margin-bottom: 0;"><strong>Summary: </strong>Glue Gun stencils are the perfect way to add personalized patterns to anything.</p>
<div class="material-resource">
<div class="material">
<p style="margin-bottom: 0;"><strong>What's Needed:</strong></p>
<ul>
<li><a href="/products/glue-guns.html" target="_blank">Westcott Hot Glue Gun and Glue Sticks</a></li>
<li>Foil Paper</li>
</ul>
<p style="margin-bottom: 0;"> </p>
</div>
<div class="resource">
<p style="margin-bottom: 0;"><strong>Helpful Resources:<br /></strong>
<a title="Glue Gun Reusable Stencils" href="{{store direct_url="products/scissors/kids-scissors/scissor-caddy.html"}}"><img alt="Glue Gun Reusable Stencils" src="{{media url=westcottbrand/CAbuttonscissorcaddy.jpg}}" /><br /></a>
<a title="Teachers Scissors" href="{{store direct_url="products/scissors.html"}}"><img alt="Teachers Scissors" src="{{media url=westcottbrand/CAbuttonteacherscissors.jpg}}" usemap="https://www.cudabrand.com/media/2072" /><br /></a><a title="Kids Scissor Packs" href="{{store direct_url="products/scissors/kids-scissors.html"}}"><img alt="Kids Scissor Packs" src="{{media url=westcottbrand/CAbuttonkidsscissorpack.jpg}}" /></a>
</p>
</div>
<p> </p>
<p style="text-align: center;"> </p>
<!-- Free Scissors Banner Begin --> <!-- Free Scissors Banner End --></div>
<p style="text-align: center; clear: both;"><em>Brought to you by Westcott – The World’s Favorite Scissors</em></p>
<!-- Blue Materials Box END --> <!-- Instructions Row Begin -->
<div style="width: 100%; margin-bottom: 20px; float: left;"><!-- Step 1 Begin -->
<div class="cp-subleft-section"><img alt="Glue Gun Reusable Stencils" src="{{media url=wysiwyg/glue_gun_stencils_1.png}}" width="300" />
<p><strong>Step 1</strong><br /> Plug in your Glue Gun and wait for it to heat up. The Westcott Glue Gun nozzle turns red when it's heated up, (you don't have to touch it to know when it's heated, yay for your fingers)</p>
</div>
<!-- Step 1 End --> <!-- Step 2 Begin -->
<div class="cp-subright-section"><img alt="Glue Gun Reusable Stencils" src="{{media url=wysiwyg/glue_gun_stencils_2.png}}" width="300" />
<p><strong>Step 2</strong><br /> On a foil paper, make any design you’d want using hot glue and wait for it to dry. Gently peel off the stencil from the foil paper once it dries and you’re ready to use it.</p>
</div>
<!-- Step 2 End --> <!-- Step 3 Begin -->
<div class="cp-subleft-section"><img alt="Glue Gun Reusable Stencils" src="{{media url=wysiwyg/glue_gun_stencils_3.png}}" width="300" />
<p><strong>Step 3</strong><br /> Place it flat on a surface and use paint to create your design. It’s best to lay the stencil on the flat side, the side that was lying on the foil.</p>
</div>
<!-- Step 3 End --> <!-- Step 3 Begin --></div>
<div style="text-align: center; width: 100%; margin-bottom: 20px; float: left;">
<p>Adult supervision is recommended when children use scissors.</br>
<!--<script type="mce-mce-text/javascript">
//var today = new Date();
//var year = today.getFullYear();
//document.write(year);
</script>-->
© 2017 Acme United Corporation. </p>
</div>
</div>
<!--[if IE 7]>
<div class="clear"></div>
<![endif]--></div>
</div>

